Introduction
This document goes through the components of Infor PM (commonly known as Comshare within N15).
If at any stage you encounter any problems, please review the support knowledge base using this link http://www.nextfifteen.co.uk/finance/Support.aspx or contact the help desk at helpdesk@nextfifteen.com
Key shortcuts:
- Infor is accessed through this link https://infor.nextfifteen.co.uk
- Upgrading from an old version of Infor? Refer to these notes
- Information around Excel templates, N15 Infor Add-In is all here
- How to use the new View Manager is here
- How to consolidate your numbers is here
Created with the Personal Edition of HelpNDoc: Free EPub producer
What's new
There are a number of changes to this version of Infor
- New URL
- Change to the application look and feel
- View Manager has been moved to the web
- The web application can be run on pretty much any browser (some exceptions although shouldn't affect the standard user)
- Production reports have been re-written. You can now double click on an item to select. The form will also remember your last selections
Created with the Personal Edition of HelpNDoc: Free EBook and documentation generator
Systems Requirements
The web application can be run on the following browsers:
- Internet Explorer 9 and 10
- Firefox - can be used for most parts of the application
- Chrome - can be used for most parts of the application
Client Software
The Budget or Reporting Add-In will run on the following:
Operating System
Windows 7, 8, 8.1
Excel
Excel 2007, 2010 and 2013 (all 32 bit only)
NB: if you install the Reporting Add-In, you will also need to install the client software as well
Created with the Personal Edition of HelpNDoc: Create cross-platform Qt Help files
Getting Started
If you are new to Infor PM, you should probably need to do the following:
- Request a user name and password from the N15 help desk. The request will need to come from your manager and we will need to know which units you should have access to
- Log into Infor and look around (you can't really break it)
- Install the N15 Infor Add-In
Created with the Personal Edition of HelpNDoc: Free Qt Help documentation generator
Installation
This section goes through how to install the client tools used with Infor.
Access to the Infor web application, does not require any software on your machine
Client software used within Infor is made up of the following:
- N15 Infor Add-In - required if you are responsible for budgeting or reforecasts. Also required to load information into Infor e.g. Stat packs, Epicor mappings etc
- Reporting Add-In - if you are using the Excel based reports, you will need to install this Add-In. You will also need to install the Client Software
NOTE: You must have administration rights on your computer in order to be able to install the application. If you do not have administration rights, you will need to speak to your IT department.
NOTE: The budget and reporting add-ins are not supported on the 64 bit version of Office. In order to use these products, you will need to install the 32 bit version instead. Please contact the helpdesk if you wish discuss.
If you do have any issues with the installation, please review the support knowledge base using this link http://www.nextfifteen.co.uk/finance/Support.aspx or contact the help desk at helpdesk@nextfifteen.com
Created with the Personal Edition of HelpNDoc: Easily create Qt Help files
Upgrading from a previous version
If you are upgrading from a previous version, please follow these steps.
1. Remove View Manager
If you have installed View Manager in the past, this will need to be removed (not sure? please follow steps below to check)
- Click the Start menu, and select "Control Panel"
- Click "Uninstall Programs" under the Programs Group
- Find "Infor PM View Manager" in the list, click on the item, and select "Uninstall" from the header bar
2. Update your Budget Add-In
There is no need to re-install the software, however you should check for updates:
- Close Excel
- From the Start menu, select Programs/Next Fifteen/Next Fifteen Budget/N15 Check For Updates
***STOP HERE IF YOU ARE NOT GOING TO INSTALL THE REPORTING ADD-IN***
3. Install the Client Software
You only need to install the client software if you are planning on installing the reporting add-in as well, otherwise the client software is no longer needed.
Follow these steps to Install the Client Software (This will upgrade any existing installed version)
4. Install Reporting Add-In
Follow these steps to install the Reporting Add-In. This will upgrade the existing installation, although please ensure you check that the add-in is pointing to the correct location (Step 9)
Created with the Personal Edition of HelpNDoc: Easily create PDF Help documents
Installing the N15 Infor Add-In
The N15 Infor Add-In (also referred to as the Budget Add-In) is required to load budget/actuals to Infor or if you do the budgeting and require to add staff to the sheets.
To install, follow these steps
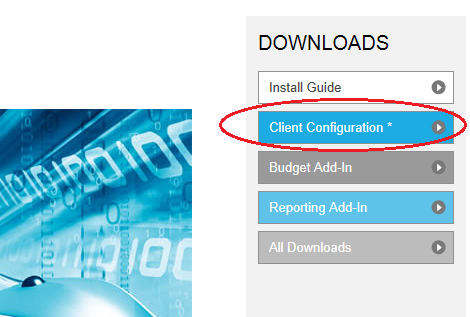
- Go to the Infor website https://infor.nextfifteen.co.uk
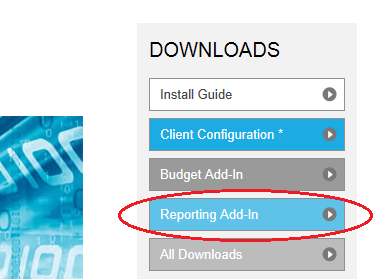
- Click on the link “Budget Add-In” from Downloads list
- Save the zip file to your local machine
- Open Windows Explorer and navigate to the location where you save the file above
- Extract the zip file to your local machine
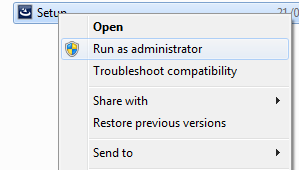
- Right click on the Setup.exe and select “Run as administrator”
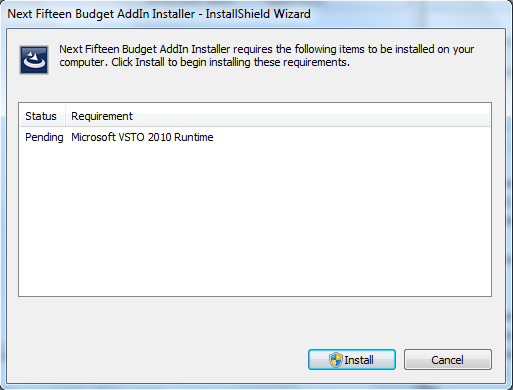
- You may be prompted to install the Microsoft VSTO 2010 Runtime. If you do, click the Install button
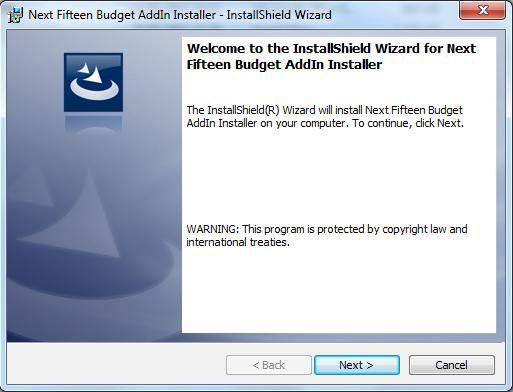
- Click the Next button
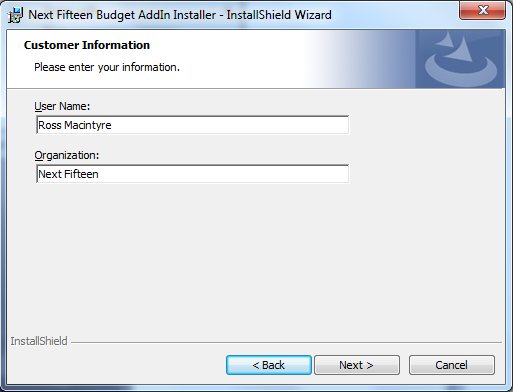
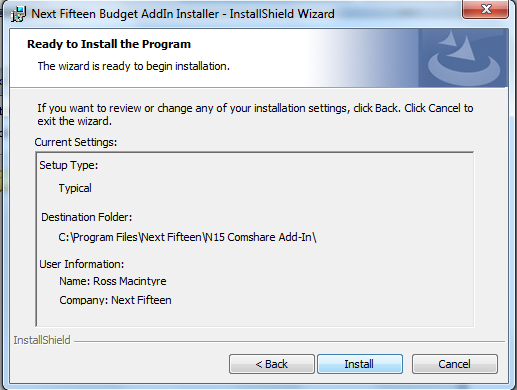
- Enter your information in the following fields and click the Next button
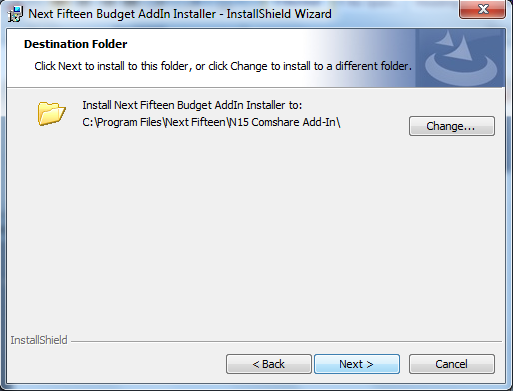
- Change the install location if needed although it is recommended to leave by default and click the Next button
- Click the Install button
- Once the install is finished, ensure that the “Launch the Program” is left ticked and click the “Finish” button

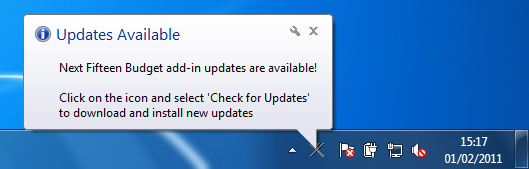
- Once completed, you should see a new icon in your system tray which indicates that new updates are available
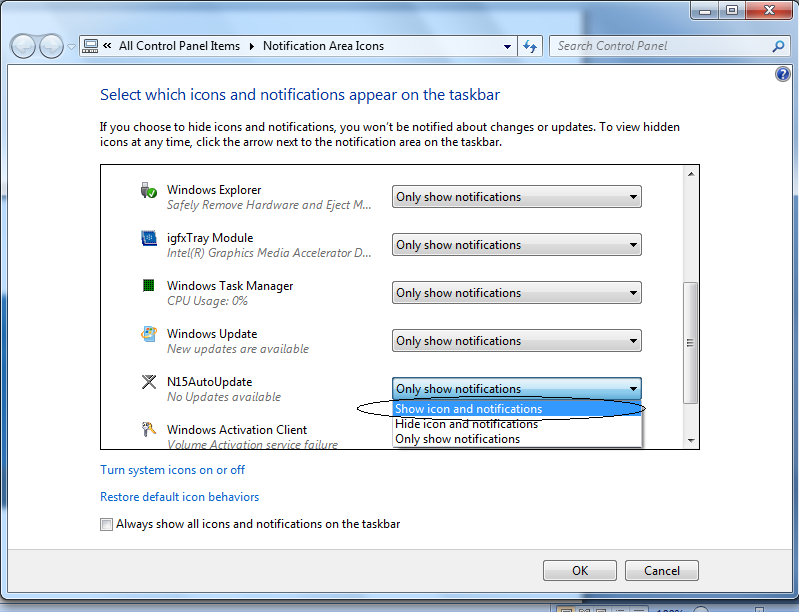
- WINDOWS 7 USERS ONLY: Due to the way the System tray works in Windows 7, you will need to make the following change:
- Click on the Up arrow to the left of the System Tray icons and click on the Customise link
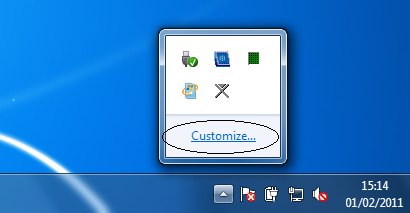
- Find the “N15AutoUpdate” and change the settings to “Show icon and notifications” and press OK
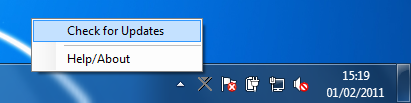
- Click on the Next Fifteen icon and select “Check for Updates”
- Provided everything worked ok, you should receive a complete message and you can click the Close button

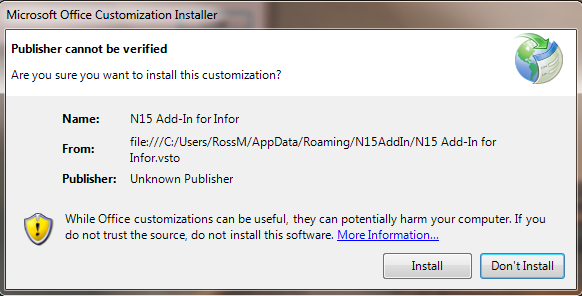
- If you have Office 2007 and above installed, you will receive the following screen. Click the Install button
- When you open Excel, the Infor add-in should appear

if you are not seeing the tab, check our support site for possible reasons
Created with the Personal Edition of HelpNDoc: Full-featured multi-format Help generator
Installing the Reporting Add-In
This document goes through how to install the Infor reporting add-in which is used to view and refresh the Infor reports within Excel. If you install this add-in, you will also need to install the client software.
You must have administration rights on your computer in order to be able to install the application. If you do not have administration rights, you will need to speak to your IT department.
- Go to https://infor.nextfifteen.co.uk and select the “Reporting Add-In” from the list
- Click the Run button when downloaded

- With the next security warning, press the Run button

- Click the Next button
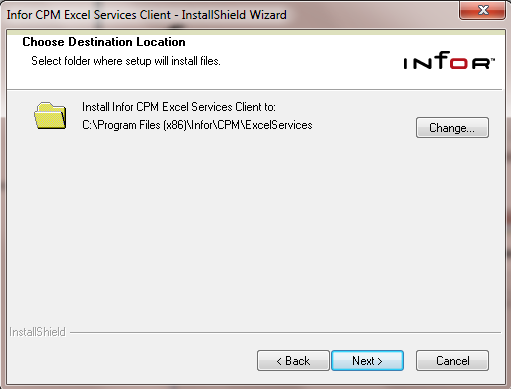
- Leave the default installation path as is (can be changed if you need) and click the Next button
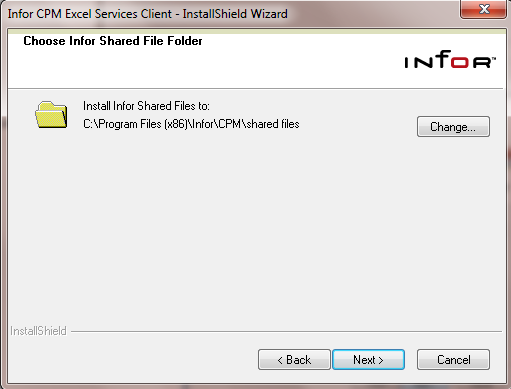
- Leave the default shared location as is (also can be changed if needed) and click the Next button
- Click the Next button to start the install

- Once completed, press the Finish button
- You now need to configure the Reporting Add-In
Created with the Personal Edition of HelpNDoc: News and information about help authoring tools and software
Configuring the Add-In
Once you have installed the reporting add-in, you will need to configure the add-in to point to the Next Fifteen servers.
To do this, follow these steps:
- Open Excel
- Click on the Add-Ins tab
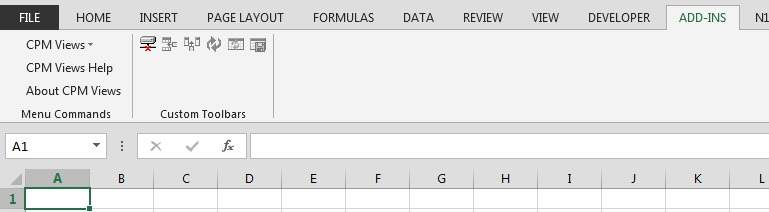
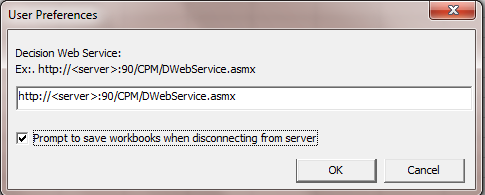
- Select the “CPM Views” option and select “User Preferences”
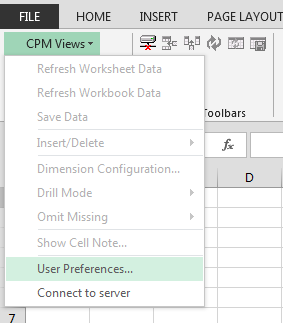
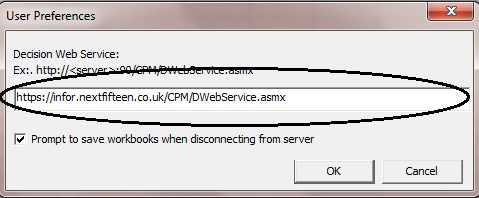
- You will need to change the “http://<server>:90” to “https://infor.nextfifteen.co.uk” as shown in the second screen. Then press OK
Created with the Personal Edition of HelpNDoc: Full-featured Kindle eBooks generator
Advanced Menu - Reporting Menu
In order to get the full menu in the reporting add-in, which will allow you to add views to a spreadsheet, you will need to follow the steps below
In the past, you were required to install the view manager, however this is no longer required.

Note: You will require Administration rights to your local machine, so if you do not have these rights, please contact your local IT helpdesk
Open Notepad and copy the following into the file
REGEDIT4
[HKEY_CURRENT_USER\Software\VB and VBA Program Settings\ComshareXL\Connection]
"UserType"="Admin"
Save the file as "AdminUser.reg" somewhere on your local machine (It is important that the file has .reg at the end)
Open Windows Explorer and find the file, then double click on the file
You will be asked for access control and then prompted if you are sure you want to make the change, say Yes.
Close Excel if open, and go back in. The new menu will show as above
Created with the Personal Edition of HelpNDoc: Full-featured EBook editor
Installing the Infor client software
IMPORTANT NOTE: YOU ONLY NEED TO INSTALL THE CLIENT SOFTWARE IF YOU HAVE OR ARE PLANNING ON INSTALLING REPORTING ADD-IN AS WELL!
- Add the Next Fifteen web site to your trusted sites:
- Open Internet Explorer
- Press the ALT key and select Tools\Internet Options from the menu
- Select the Security Tab
- Click on the Trusted sites zone
- Click the Site Button
- Enter “https://*.nextfifteen.co.uk” and press Add
- Enter “http://*.nextfifteen.co.uk” and press Add
- Click the Close button
- Click the OK button
- Run IE as Administrator
- Close all Internet Explorer windows open
- Right Click on the Internet Explorer icon and select “Run as administrator”
- Go to https://infor.nextfifteen.co.uk and client on the Client Configuration link
The first time you connect to this page, depending on the version of Internet Explorer you are using, you will be prompted to install some software from Macrovision.
Either click the Install button as shown below
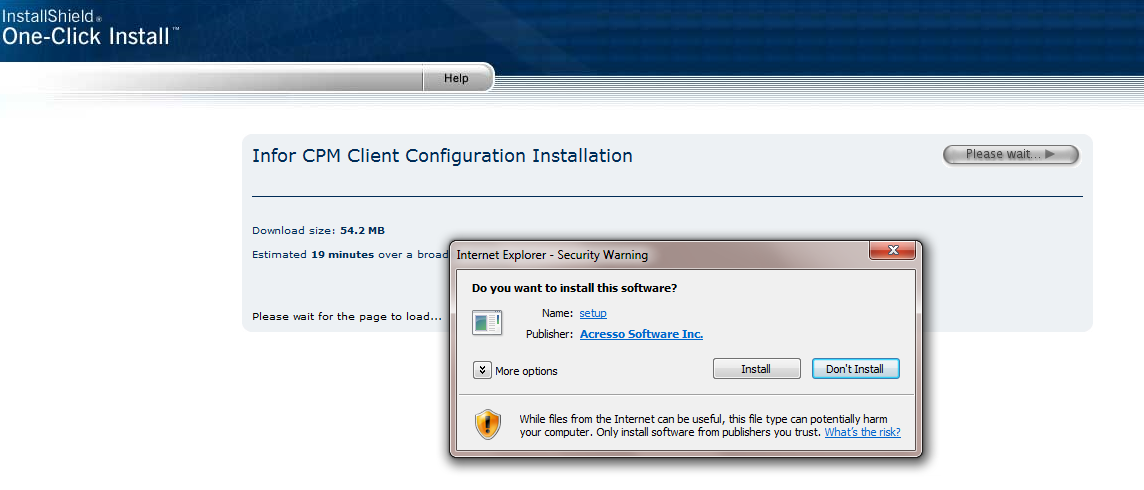
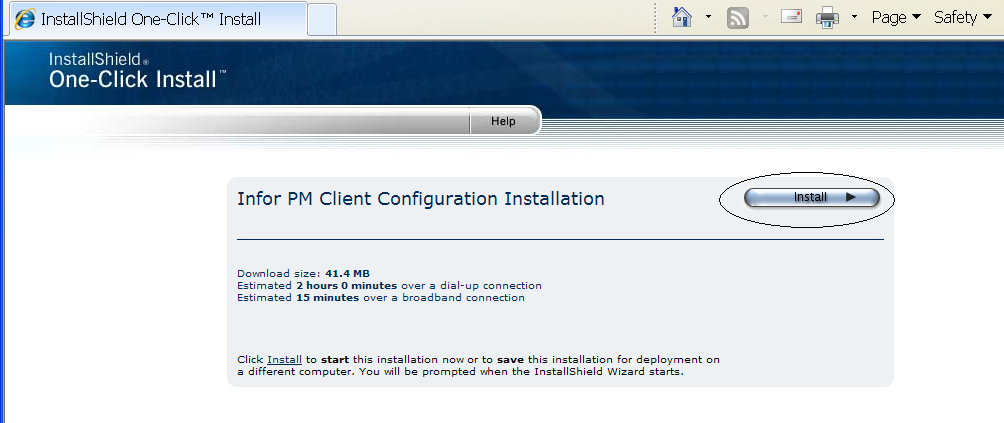
Once this software has been installed, the “Please wait…” button will change to “Install”
- Install the Client Software
Click the Install button. If the Install button is not showing, please ensure you have run steps 2 & 3.

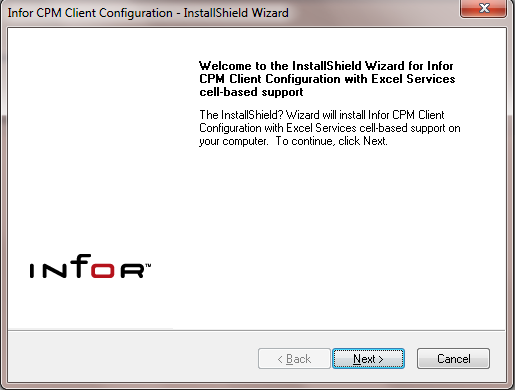
Click the Next button
Click the Next button
The URL’s in the next page will have already been populated for you, so please click the Next button
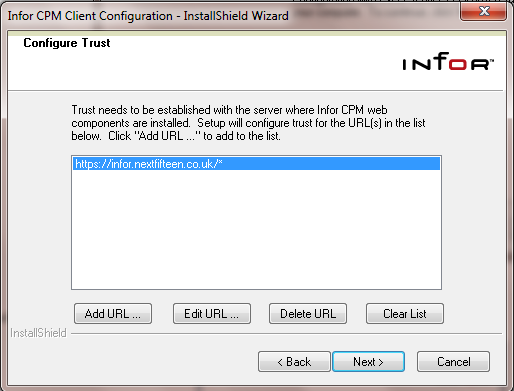
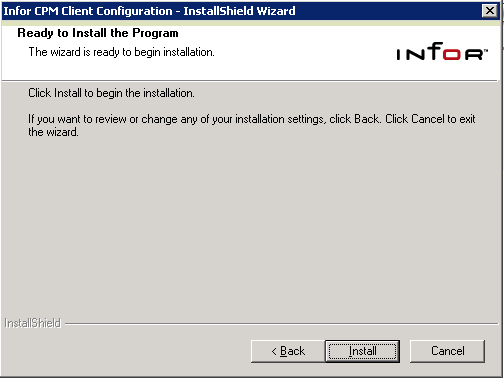
Click the Install button
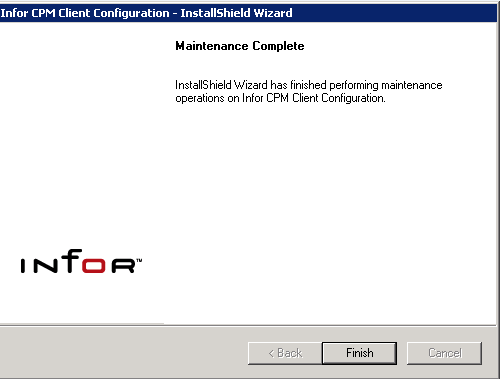
Click the Finish button
Created with the Personal Edition of HelpNDoc: Easy EPub and documentation editor
Excel Templates
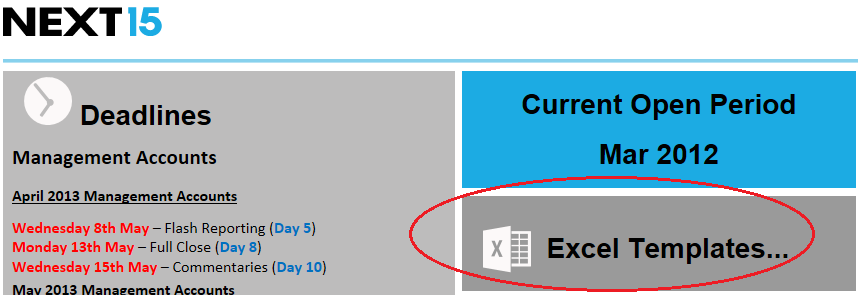
Next 15 uses a number of Excel spreadsheets in order to load information into the application.
These templates are available from within the Infor application, under the Tasks menu, or on the home page as shown below

Created with the Personal Edition of HelpNDoc: Free HTML Help documentation generator
Excel Templates
Each template is designed for a specific financial year and are grouped by year in the Excel template download page shown below
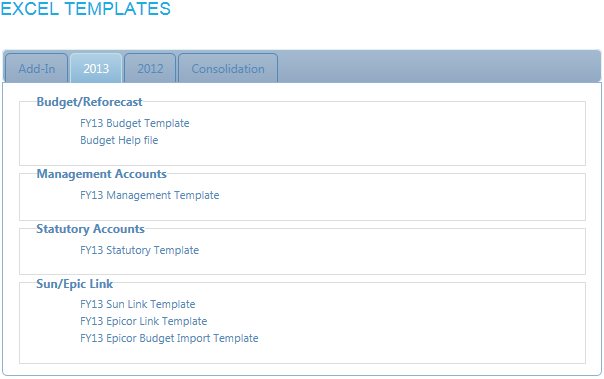
NB: Each template is designed for a specific financial year, so please ensure that the correct version is used. You can tell which year the spreadsheet applies to from within the Header sheet
Budget Template
This is used for the initial budget and any future reforecasts.
Management Template
You can use this to load your actuals into Infor. If you use Epicor or Sun, then you would normally set up the link to your accounts by using the Sun or Epicor link template below.
Statutory Template
Used for reporting your Interim or Full year statutory results
Sun Link Template
If you use Sun Accounts, then this template allows you to map your Sun Chart of Accounts to Infor's, to allow for uploading of your results directly to Infor
Epicor Link Template
If you use Epicor, then this template allows you to map your Epicor Chart of Accounts to Infor's, to allow for uploading of your results directly to Infor
Epicor Budget Import Template
Allows your budget or reforecast in Infor, to be downloaded into Epicor for local reporting
Consolidation Template
This template is found it its own tab and can be used to consolidate a number of the budget or management templates together without the need to upload to Infor
Created with the Personal Edition of HelpNDoc: Free EPub producer
Budgeting Process
This briefly goes through how to enter your budgets
- Download and open the Budget template in Excel, ensuring you are using the template for the year you are budgeting for
- Update your client list - The first time you do this, you will be asked for the unit you are budgeting for. The clients for that unit will be added to the income sheets
- If you are missing clients in the list, follow the steps outlined here and then update your client list again
- TIP - Salary and Asset information can be imported into a blank spreadsheet which saves you from having to enter them again. Follow the steps here
- Income
- This is broken down by Retainer, Project and Inter-company
- Enter the expected income for each client
- Projected client wins can entered against the client "New Client"
- Mechanical Income and Expenses
- This is calculated from a percentage of income
- In each income sheet next to the yearly total, there are two columns
- Mech % - Enter the expected percentage of income which would normally equal your Mechanical Expenses
- Profit on Mech % - Enter the expected profit on Mechanical %
- Extraordinary Mechanicals can be entered in the Mechanicals sheet
- Salaries
- Employee salaries are entered using the N15 Infor Add-In. Steps on how to enter salaries is outlined here
- Some of the other lines in the sheet can use derived as a percentage of salaries. If you use this option, please ensure you only enter a percentage in this field. If you write text, then it will cause the export to fail
- Assets/Depreciation
- Depreciation can be created based on the individual assets entered through the add-in which is described here
- Alternatively you can enter the amount in the Depreciation sheet
Once you have entered your budget, it can be exported to Infor following these steps
Created with the Personal Edition of HelpNDoc: Free help authoring environment
Reforecast Process
The reforecating process follows the Budgeting process as outlined here apart from a couple of setup steps:
- Starting with last reforecast spreadsheet, of if this is the first reforecast of the year, then last budget
- Select the last completed budget or reforecast spreadsheet
- If you do not have one on hand, start with a blank budget template
- Import the last reforecast (normally the "Current Reforecast", or if this is the first reforecast, select the latest budget ("Final Budget")
- Import Actuals into the template
- Go to this page and follow the steps under the heading "Import Actuals into Reforecast"
Once this has been done, you are ready to complete the reforecast. Refer to the Budget Process for more information
Created with the Personal Edition of HelpNDoc: Create cross-platform Qt Help files
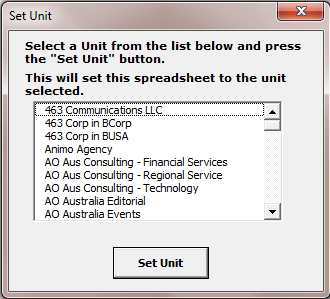
Selecting a Unit
When you first either update a client list or import data, if no unit has been set for the spreadsheet, you will asked to select a unit from a list.
The list of units shown will be based on your security rights. If the unit you are looking for is not there, please contact the helpdesk.
Created with the Personal Edition of HelpNDoc: Produce Kindle eBooks easily
Setting up a Stat Pack
Setting up a Stat pack is a little different compared to the other templates.
The Stat pack allows you to group a number of units together on the same spreadsheet, provided that:
- they are all owned by the same company
- and they all have the same base currency
To set up the Stat Pack, click on the "Import Data" button. This will show you a form like below

Choose one of the Units from the Available List and click the ">" button
You will be asked whether you want to select all the units with the same Statutory Entity as the one selected. In most cases, we recommend you choose Yes
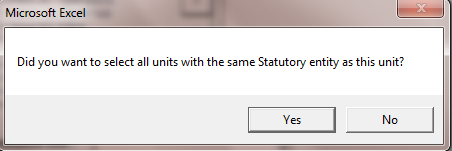
If you chose Yes, then the Selected Units will populated for you.
You then need to nominate a unit. This will be a unit which the information will be loaded back to. There is no preference as to which one you choose, so just choose the first one on the list.
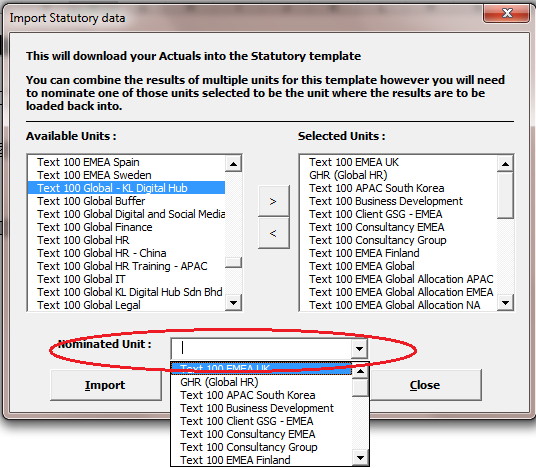
Click the Import button
Created with the Personal Edition of HelpNDoc: Full-featured Help generator
N15 Infor Add-In

Once installed, you will see a tab within Excel that looks a bit like this (Slight changes in the icons used depending on the version of Excel you are using)
Created with the Personal Edition of HelpNDoc: Write eBooks for the Kindle
Update Client List
The list of clients for each Unit in Infor, is maintained centrally by Next 15.
If you wish to add new clients, please refer to the instructions here.

By clicking on the "Update Client List" button in the toolbar, this will update the client list within the spreadsheet*.
Any new clients will normally be added to bottom of the list.
If you want to sort or hide any client within the spreadsheet, click here to find out how.
* If no unit has been assigned to the spreadsheet, you will be asked to select a unit. Follow these instructions if you are not sure what to do.
Created with the Personal Edition of HelpNDoc: Write EPub books for the iPad
Import Data

Import Data, as the name suggests, allows you to import into the template.
Depending on the type of template, will determine what you can import.
Budget/Reforecast Template
You can import Budget (or Reforecast) data entered in Infor, into a blank template. This can save a significant amount of data entry time.
Follow these steps to complete:
- Open a blank template (the importing of data is designed to work with a blank template, there is no guarantee that the import will work if the template has data already entered, in fact, in some cases, it will duplicate the data already entered.)
- Load the list of clients for the unit you are wanting to load data for
- From the (N15 Infor) tab, select “Import Data”.
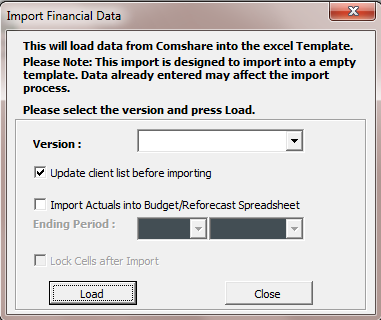
- Select the version you want to import.
- Click the ‘Load’ button.
NB: This process may take a bit of time depending on the number of Employees and Assets you are trying to import and the speed of your machine.
Importing Actuals into your reforecast
In the budget template, you are able to download Actuals over your budget for a number of months selected. This is generally done for reforecasting.
To load actuals over your budget, follow these steps:
- Follow the steps above but instead of selecting a version, tick the box “Import Actuals into Budget/Reforecast Spreadsheet”.
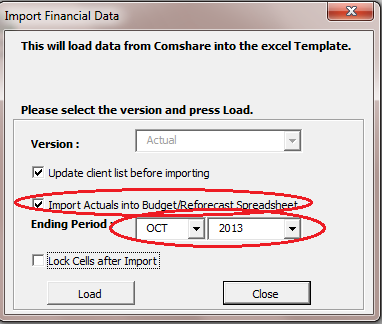
- Select the ending Month and Year which you want import.
- You have the option of ticking the "Lock Cells after Import". This will lock the imported Actuals so the people cannot change those months imported.
- Click the ‘Load’ button.
Importing Actuals into the Management Template
The process is the as the budget template although you will only have the one version to choose from being "Actual".
Select this version and please Load

Created with the Personal Edition of HelpNDoc: What is a Help Authoring tool?
Export Data
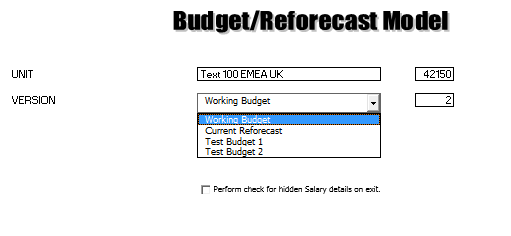
Once you have completed entering your figures, you can then export your results to Infor.
To do this, follow these procedures:
- For budget/reforecasts, in the Header sheet, ensure you have the correct version selected as this will determine where it is exported in Infor
- Click the
 button on the N15 Infor tab.
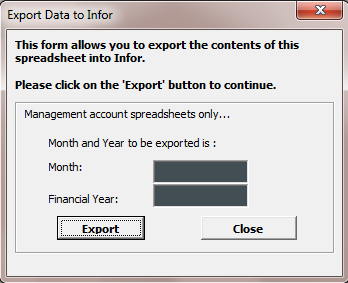
- FYI - for Management Account spreadsheets, the Month and Financial Year boxes will be populated with the month and year which is allowed to be imported into Infor. This is set by Next 15 and cannot be changed.
- Click on the export button.
Please Note: This will overwrite all existing data in Infor for this period.
Provided no errors are incurred, once completed the results can be reviewed in Infor.
NB: Please leave 5 mins after the export is completed in order for the consolidation to complete before running any reports from Infor.
Created with the Personal Edition of HelpNDoc: Produce electronic books easily
Bulk Export Data
If you have a number of spreadsheets which you need to export to Infor, you can upload these in bulk by using this feature.
Click on the  button on the N15 Infor Tab, which will give you a form as shown below.
Click on the "..." button against each row and select the spreadsheet you want to upload.
Once you have selected all your spreadsheets, click the Export button.

Created with the Personal Edition of HelpNDoc: Easily create PDF Help documents
Client functions
Under the Clients option, you have the ability to Sort Client alphabetically, and hide/unhide clients from view
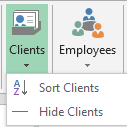
Sorting clients Alphabetically
When you update your client list, new clients get added to the end of the list. If you wish to sort the clients alphabetically, from the N15 Infor, select Clients and then “Sort Clients”.
Hiding and Un-hiding Clients
To hide a client in your list, highlight the row that the client is in, and then press the Hide Clients option Clients menu. Repeat for any other client.
If you wish to un-hide a client, in the worksheet where the client is hidden, press the <SHIFT> button and hold and then press the Hide Clients option in the client menu. A list of hidden clients will be shown. Select the client you want to un-hide, and then press the un-hide button
Created with the Personal Edition of HelpNDoc: Easy CHM and documentation editor
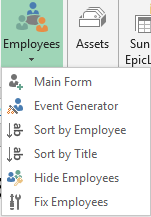
Employee Functions
Within the Budget/Reforecast templates, Employees can can be added and maintained by using the functions under Employees menu
Created with the Personal Edition of HelpNDoc: Free help authoring tool
Employee Main Form
Adding a new Employee
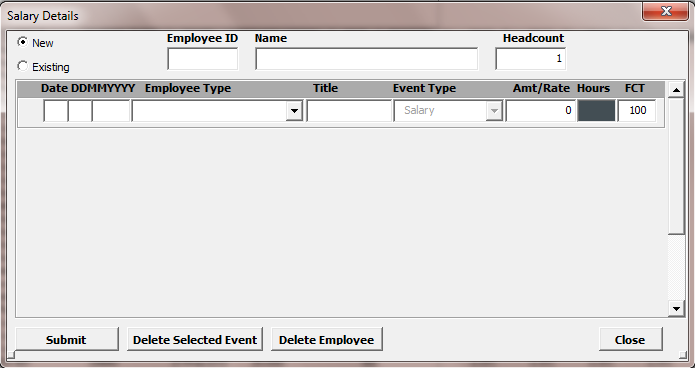
To enter a new employee
- Ensure the "New" option is chosen
- Enter a unique Employee ID
- Enter Name (this must be unique)
- Enter Number of People (The salary will be increased by the number of people)
- Enter Start Date (dd mm yyyy)
- Select Employee Type (this will determine if they are direct or indirect)
- Enter Employee Title
- Enter Annual Salary
- FTE = Full Time Equivalent. Default is 100% but you can change this too less if the person only works a percentage of time for the unit. This will reduce the salary calculation accordingly.
- Press submit
Add new Events
You can easily add events to a new or existing employee by selecting the employee
- Enter the date for the change
- Select the Event Type
- Enter the Amount or Percentage (depending on the event)
- Press Submit
Delete Selected Event
Select the employee, then tick the box you against the line you want to remove. Press the ‘Delete Selected Event’ button.
Delete an Employee
Select the employee you want to delete and then press ‘Delete Employee’
Change an Employee's Name
To modify an employee’s name, select the existing employee and press the ‘Name’ button. Enter the new name and press OK.
Created with the Personal Edition of HelpNDoc: Create help files for the Qt Help Framework
Event Generator
The Employee Event Generator allows you to add an event to all or selected group of active employees all at once, rather than one at a time.
This could be useful if you plan on applying a bulk bonus rate
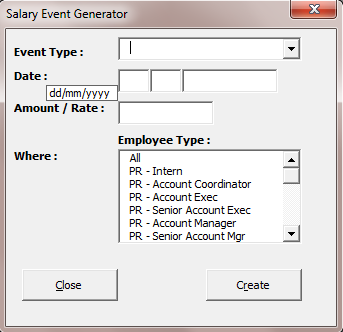
- Select the Event Type you want to Add.
- Enter the date (dd/mm/yyyy) which you want the event to take affect from.
- Enter the amount, or if a percentage event, the percent to be applied.
- Select the Employee Type(s) you want the event to be applied against.
- Press the Create button
Created with the Personal Edition of HelpNDoc: Create help files for the Qt Help Framework
Sorting
As the name suggests, you are able to sort the employees in the Summary sheets
Just choose the option you want to sort by in the Employee menu
Created with the Personal Edition of HelpNDoc: Easily create EPub books
Hiding Employee Details
As other people may need to review these spreadsheets who should not know who everyone’s salaries are, we have included the functionality to hide the salary information from view.
To activate this functionality, click on the "Hide Employees" option under the Employee Menu.
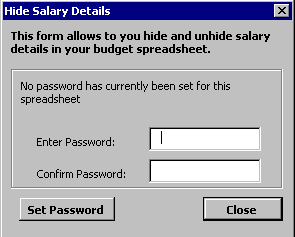
You will be asked for a password.
Enter the password and then confirm, then press the ‘Set Password’ button.
This will then hide the salary details. To un-hide, press this button again and then re-enter your password.
NB: Once the password has been set for the first time, you cannot change it, so please ensure that you do not forget what the password is.
Created with the Personal Edition of HelpNDoc: Easily create EPub books
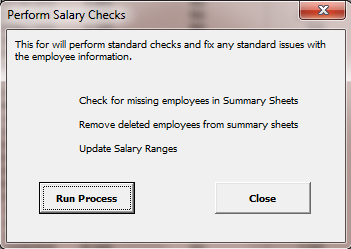
Fix Employees
This performs a number of checks relating to employees. This can be run at any point and helps ensuring the smooth running of the spreadsheet
Created with the Personal Edition of HelpNDoc: Benefits of a Help Authoring Tool
Assets
To enter an Asset in the Budget or Reforecast model, click on the  button.
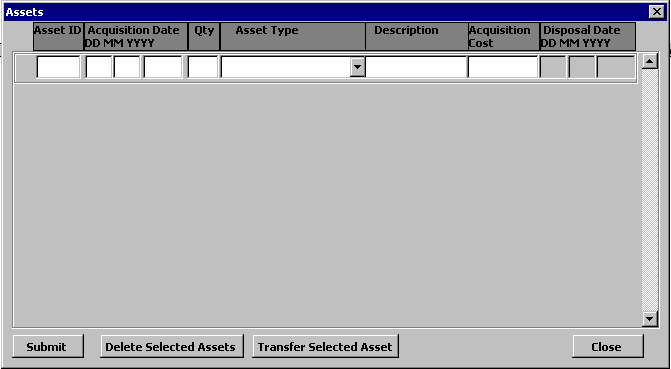
- Enter a unique Asset Id in the empty row
- Enter Acquisition Date
- Enter Quantity
- Select Asset Type
- Enter Description of Asset
- Enter Unit Cost (if you have entered more than one in the Quantity field, the cost will be multiplied by the Quantity entered)
- Press Submit
Select the asset you want to delete by clicking on the tick box and then press ‘Delete Selected Asset’.
Select the asset you have sold by clicking on the tick box, enter the date of sale and then press ‘Transfer Selected Asset’.
Select the asset you have sold by clicking on the tick box, enter the new details and press submit.
Created with the Personal Edition of HelpNDoc: Produce electronic books easily
Maconomy Links
This menu allows you to import the Maconomy link mappings

This is discussed in more detail here.
Created with the Personal Edition of HelpNDoc: Free CHM Help documentation generator
Rolling Reforecast
Rolling Reforecast
This menu allows you move the starting month of a budget spreadsheet to allow for a rolling 12 month reforecast.
This will only work if you have not imported Actuals into your budget. If you have, then you will need to start from a blank budget spreadsheet. Import your budget/reforecast, then move the month.
To move the budget month, click the Set Rolling Month button, and then choose the Month the 12 months is to start from, and then click Set Period
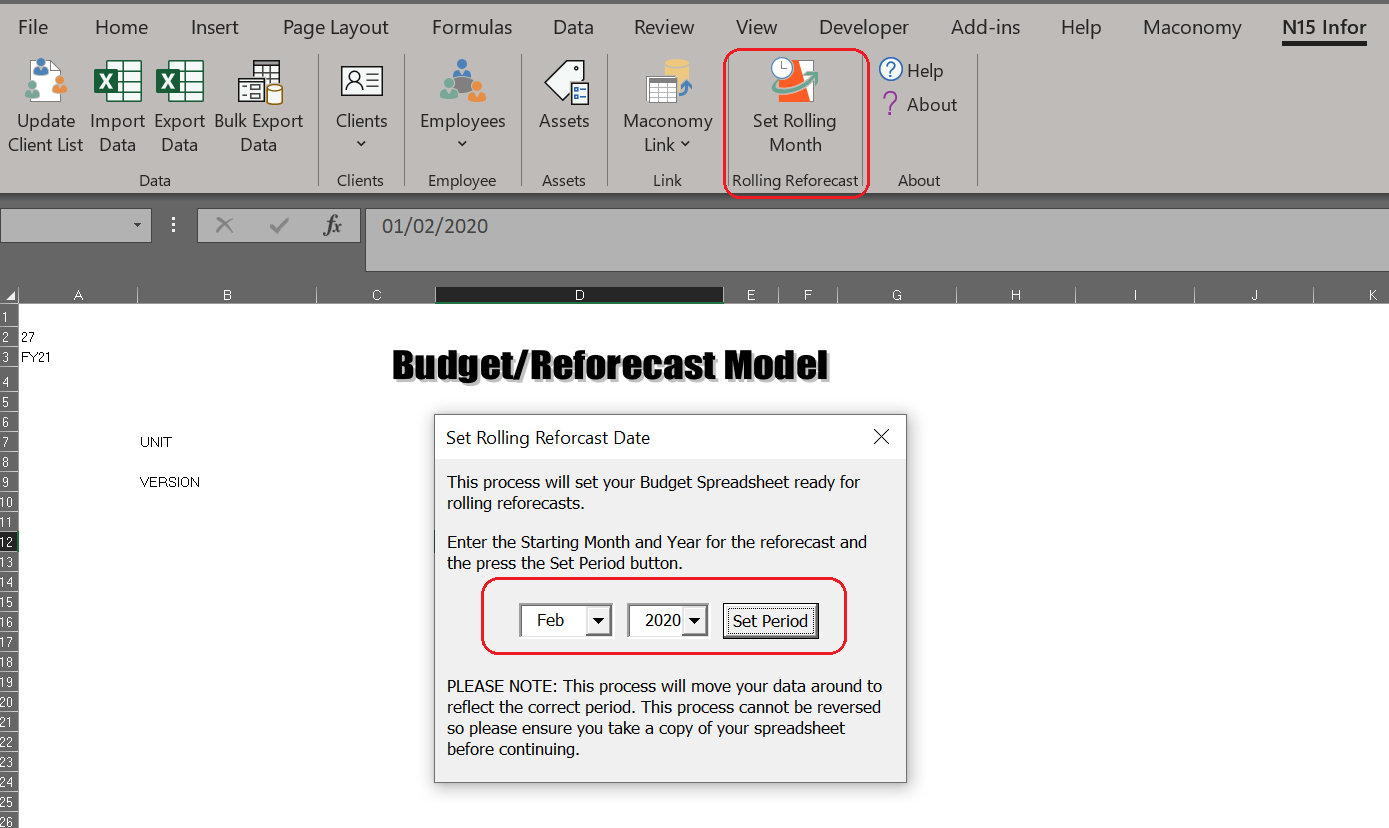
The process will move the data already entered to the starting column. You will then be able to enter data in the new months.
Created with the Personal Edition of HelpNDoc: Qt Help documentation made easy
Maconomy Links
This document covers the steps required to link Maconomy to Infor.
The link between the two systems is handled by the Excel spreadsheet which you will be required to populate with your Maconomy Accounts against the account in infor.
This spreadsheet is the key to it all so this document will concentrate on this spreadsheet and how you populate it.
If you do have any questions, please do not hesitate to contact the Helpdesk
Created with the Personal Edition of HelpNDoc: Easily create EBooks
Initial Setup
Before you start mapping your accounts, you need to tell the spreadsheet which unit this spreadsheet is for, download that unit’s clients and also let the spreadsheet know which database you want to link it to.
- Set the Unit for the spreadsheet and download the client list.
As with other spreadsheets, you need to tell it which Unit the spreadsheet is for.
You can do this by selecting the “Update Client List” from the N15 Infor Add-In.
Enter your Infor login and password when prompted.
Select the unit from the list of units provided and press ok
This will now populate the spreadsheet with the clients for this unit.
- Next you need to let the spreadsheet know which Company this unit links to.
In the Header sheet, enter the Maconomy company no. for this unit.
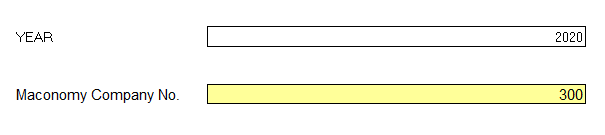
Once completed, your spreadsheet is now ready for entering your account mappings.
Created with the Personal Edition of HelpNDoc: What is a Help Authoring tool?
Sun Link Mappings
Each sheet in the template has the Infor Accounts (or Clients) going down the page has columns going across the page for the Sun Account Codes, A Codes and T Codes.
Against each row, you will need to enter the combination of Accounts, A Codes and/or T Codes which map this account in Sun.
NB: Throughout these examples, I will mention either Accounts or A Codes but the same process applies whether it be a A Code, T Code or Account Code.
When entering your accounts, you need to enter them in the following format:
(ABCD;)
The Statement always starts with an Open Bracket and must end with a Closing Bracket.
Each Account must end with a semi colon.
Here is a list of examples as to what you can do:
(ABCD;) |
Include the account ABCD only |
(ABCD;EFGH;) |
Include accounts ABCD and EFGH only |
(ABCD;&LMNO;) |
Include accounts BETWEEN ABCD and LMNO |
(ABCD;&EFGH;)+(LMNO;) |
Include accounts between ABCD and EFGH PLUS account LMNO |
-(ABCD;) |
Include minus ABCD [this can be handy when you want a positive account to be shown as a negative e.g. Mechanical Expense line in Sun to be shown as Mechanical Income in Infor (Income is normally shown as a credit)] |
(ABCD;)-(EFGH;) |
Include account ABCD less account EFGH |
(ABCD;&EFGH;)-(LMNO;) |
Include the accounts between ABCD and EFGH less account EFGH |
You can now start looking to mix and match these accounts.
In this example, we have included A3 codes but we also want to limit the results by the T7 code NYC.

This example also highlights a couple of interesting points.
Profit on Mechanicals is made up of Mechanical Income (A3 Code PL150) less Mechanical Expenses (A3 Code PL160).
As you can see from the formula, it is not shown as (PL150;)-(PL160;) which you may have expected but what you are doing is actually adding the two accounts together.
The reason for this is that in Sun, PL150 is a credit and PL160 is a debit so adding the two accounts together does exactly what we want.
When creating these mappings, always consider the sign in Sun as well as the sign in Infor.
Infor works the same way as Sun in that Income is expected to be a credit e.g. this is why we put a minus in front of Mechanical Income as we are assigning Mechanical Expenses to this line.
Created with the Personal Edition of HelpNDoc: Generate Kindle eBooks with ease
A couple of Rules and Limitations
- CODES ENTERED ARE CASE SENSITIVE!!!!!!!
ABCD does not equal abcd
- You cannot use the minus sign with T Codes. The minus sign can only be used with Account or A Codes.
- You cannot mix Account and A Codes where a minus has been used

- If you are going to use a minus sign, it must be used at the end of the statement.
(ABCD;&DEFG;)+(HIJK;)-(JKLM;) CORRECT
(ABCD;&DEFG;)-(JKLM;)+(HIJK;) INCORRECT
Created with the Personal Edition of HelpNDoc: Easy EBook and documentation generator
Epic Link Mappings
Each sheet in the template has the Infor Accounts (or Clients) going down the page has columns going across the page for the Epicor Chart of Account Segments and Reference Codes.
Against each row, you will need to enter the combination of Nominal Codes, A Codes and/or Reference Codes which map this account in Epicor for this unit.
NB: Throughout these examples, I will mention Accounts but the same process applies to any of the segments unless otherwise stated.
When entering your accounts, you need to enter them in the following format:
(ABCD;)
The Statement always starts with an Open Bracket and must end with a Closing Bracket.
Each Account must end with a semi colon.
Here is a list of examples as to what you can do:
(ABCD;) |
Include the account ABCD only |
(ABCD;EFGH;) |
Include accounts ABCD and EFGH only |
(ABCD;&LMNO;) |
Include accounts BETWEEN ABCD and LMNO |
(ABCD;&EFGH;)+(LMNO;) |
Include accounts between ABCD and EFGH PLUS account LMNO |
-(ABCD;) |
Include minus ABCD [this can be handy when you want a positive account to be shown as a negative e.g. Mechanical Expense line in Epicor to be shown as Mechanical Income in Infor (Income is normally shown as a credit)] |
(ABCD;)-(EFGH;) |
Include account ABCD less account EFGH |
(ABCD;&EFGH;)-(LMNO;) |
Include the accounts between ABCD and EFGH less account EFGH |
You can now start looking to mix and match these accounts.
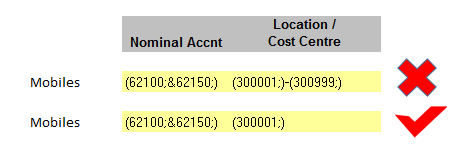
In this example, we have included Nominal codes but we also want to limit the results by the location/cost centre.

This example also highlights a couple of interesting points.
Profit on Mechanicals is made up of Mechanical Income less Mechanical Expenses.
As you can see from the formula, it is not shown as (35000;)-(36000;) which you may have expected but what you are doing is actually adding the two accounts together.
The reason for this is that in Sun, 35000 is a credit and 36000 is a debit so adding the two accounts together does exactly what we want.
When creating these mappings, always consider the sign in Epicor as well as the sign in Infor.
Infor works the same way as Epicor in that Income is expected to be a credit e.g. this is why we put a minus in front of Mechanical Income as we are assigning Mechanical Expenses to this line.
Created with the Personal Edition of HelpNDoc: Easily create HTML Help documents
A couple of Rules and Limitations
- You cannot use the minus sign with Reference Codes. The minus sign can only be used with Nominal, Location or LOB Codes.
- You cannot mix Account and one of Account Segements where a minus has been used
- If you are going to use a minus sign, it must be used at the end of the statement.
(ABCD;&DEFG;)+(HIJK;)-(JKLM;) CORRECT
(ABCD;&DEFG;)-(JKLM;)+(HIJK;) INCORRECT
Created with the Personal Edition of HelpNDoc: Generate Kindle eBooks with ease
Epic Import Mappings
The Epic Import Template allows the importing of the budget or reforecast from Infor into Epicor, so that you can report through FRx.
The setup of the spreadsheet is the same as the Epic Link, although the Mapping is a little different.
With the Epic Import sheet, you are mapping the Chart Of Accounts in Infor to Epicor.
This is a one to one relationship, so there is no ranges etc.
You will only be entering the single code for each line.


Created with the Personal Edition of HelpNDoc: Create cross-platform Qt Help files
Upload Mappings
Once you have completed creating your Link Template, you need to send it to Infor.
You do this by selecting Export Data from the N15 Infor tab.
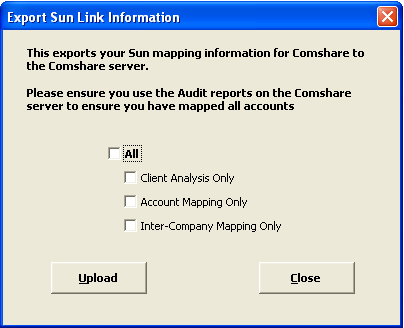
Click against All then press the Upload button.
The Add-In will then do a check of the structure to ensure you have entered valid formulas, once completed, it will then send the data to Infor.
If you do receive an error message (as shown below), you can view the errors by clicking on the yes button. All errors must be fixed before data can be sent to Infor.

Created with the Personal Edition of HelpNDoc: Free CHM Help documentation generator
Infor PM Web Application
This section covers the menus and options available within the Infor PM application
Access to the application is through this link https://infor.nextfifteen.co.uk
Created with the Personal Edition of HelpNDoc: Full-featured EBook editor
Tasks Menu
This goes over the items available within the Task menu in Infor
Created with the Personal Edition of HelpNDoc: Produce electronic books easily
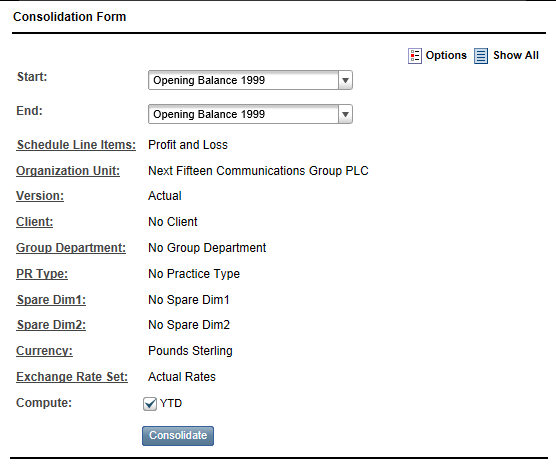
Consolidation Form
The Consolidation Form, as the name suggests, consolidates the numbers loaded into Infor at the rate and currency specified.
Generally, if you every have questions as to the validity of the numbers, always run a consolidation before escalating to the helpdesk.
To run a consolidation:
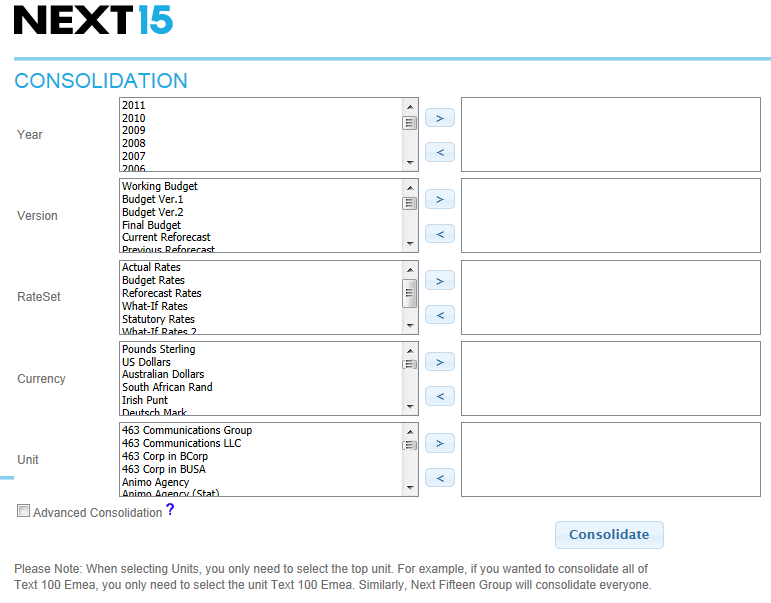
- Open the Consolidation Form (Tasks > Consolidation Form)
- Select the options you want to consolidate (either double click on the item to move it across, or select and press the > button), Year, Version, Rateset and Currency
- Select the Unit(s). With the units, the consolidation will consolidate all the units underneath the unit selected by default, so you only need to select the main parent i.e. Text 100 EMEA Region for all all Text 100 EMEA, rather than all the individual offices
- Advanced Consolidation - tick this box ONLY if you are having issues with a particular unit where the numbers are not summing up correctly. This option will SIGNIFICANTLY affect the speed of the consolidation, and should ONLY be used against a single data-entry unit which is experiencing the problem. What I mean by that is that if I was running a report for Text 100 EMEA Region and the numbers were not adding up correctly. I wouldn't run the consolidation with the advanced setting on this unit, but I will look at the individual units which make up this region and find the problem unit. I would then run the consolidation with the advanced option ticked on this unit only before running a normal consolidation on the Region.
- Press the Consolidate button
Created with the Personal Edition of HelpNDoc: Easily create Web Help sites
Advanced Consolidation
The Advanced Consolidation page is used when the Consolidation Form has failed to consolidate the numbers properly, even with the Advanced Consolidation tick box enabled.
The page allows you to concentrate the consolidation to a specific schedule line where you are having the issues, and in conjunction with the Options selections, force through the recalculation.
To run an advanced calculation:
- Open the Advanced Consolidation Form (Tasks > Advanced Consolidation)
- Select the Start Period (Normally Opening Balance XXXX)
- Select the End Period (Normally Total Year XXXX)
- Schedule Line Items: Select the Schedules applicable (process of selecting is the same as choosing On-Grid Members in the Pivot Report)
- Version : Select Version
- Client: Unless consolidating Income lines, leave as No Client
- Group Department: Unless consolidation Salaries, leave as No Group Department
- PR Type: Leave as No Practice Type
- Spare Dim 1 & 2 : leave as No Spare 1 or 2
- Currency : Select the currency you want to conolidate
- Exchange Rate Set : Select the Rate Set
- Compute : If you want to consolidation Year to date, tick the YTD option
- Click on the Options icon in the top right of the form
- The full explanation of each option is listed here however we recommend you tick the following:
Created with the Personal Edition of HelpNDoc: Create help files for the Qt Help Framework
Consolidation Options
This section includes all the consolidation options. Not all options listed are available for all types of consolidations.
The Compute Allocations option computes allocation formulas for translated currencies. For information on creating allocation formulas, see the Architect Guide. This option is not available for local consolidations.
The Read Local Consolidated Data option reads and translates data that is loaded or submitted to non-leaf members of hierarchical dimensions (except the Period dimension). This option is ignored during level depth consolidations.
The Read Consolidated Member P0 Balances option determines whether P0 data for consolidation members is read from the database or recalculated by the consolidation process. When this option is selected, P0 data is read from the database. Always Read Consolidated Member P0 Balances from the database if ownership relationships change during the year. Deselect this option to have the consolidation process calculate the P0 balance by taking the legal unit's P0 ending balance data and applying the P0 ownership percentages. Recalculating P0 balances for consolidation members is recommended if ownership relationships do not change throughout the year.
The Skip Local Consolidations option omits writing local currency results back to the database when translating currencies. This option is not available for local consolidations.
The Use Net Adjusted Off-sheet Data option is for Financial Consolidation only. It evaluates adjustment data and net data for formulas whose sources are not part of the consolidation scope and have been adjusted. Select this option only when the consolidation scope does not include adjustments to the selected accounts. This option is not available on the Local Consolidation form.
The Point Consolidation option writes data back to the database for the selected member and its leaf members but skips the intermediate members. When Suppress Leaf Writeback is also selected, a point consolidation only writes data back to the selected member. It is disabled if Level Depth Consolidations is selected.
The Suppress Leaf Writeback option suppresses writeback to leaf members during a consolidation.
This option is not available on the Consolidation Status Monitor's report page. It is disabled if Level Depth Consolidations is selected.
The Ownership Managerial Consolidation option displays when the Ownership process is turned on. If this check box is selected, the consolidation engine does not roll up data at 100% following the structure created in Architect at consolidation nodes where the unit exists without a holding parent unit.
The Level Depth Consolidations option reads previously consolidated parent members (virtual leaf member) at the starting level of the consolidation and also consolidates and reads all true leaf member at this level. It then consolidates all remaining members up to, and including, the target member.
- Dimension. Select a hierarchical dimension for the starting level of the consolidation.
- Level. Select how many levels down from the selected member you want to start the consolidation.
Level 1 includes the children of the selected member; level 2, the grandchildren; level 3, the great-grandchildren, and so on. You can select up to ten levels (0-9). The 0 level is a special case that allows you to start the consolidation at the leaf level (if leaf processing is not suppressed). Use level 0 if your data slice includes ownership data.
- The Suppress Leaf Processing option reads existing data from in-scope leaf members without reconsolidating. Leave the check box clear to consolidate in-scope leaf members. If Suppress Leaf Processing is selected and the level depth is 0 (resulting in a currency consolidation), ownership data is used for rollups, and Ownership journals are posted. If this option is clear, ownership data is used for rollups, but Ownership journals are not posted.
A level depth consolidation ignores Read Local Consolidated Data and cannot be used with Point Consolidation.
The Calculation passes option determines the number of consolidation passes to perform. The default setting is 1.
The Seconds between Progress Updates option determines how frequently the Consolidate Status dialog box should refresh during the consolidation. The default is every 30 seconds.
The Process Unsubmitted Statements option determines whether to process all in-scope leaf member combinations or only those with data during a local consolidation. This option is useful if a schedule includes only formulas that need to be calculated but otherwise the schedule is empty. It is also useful if there are cross-dimensional formulas or allocation formulas on a schedule. These formulas can pull data from other places so that even if no data has been submitted for the selected schedule, the formulas on the schedule can use data from other sources.
Created with the Personal Edition of HelpNDoc: Easily create Qt Help files
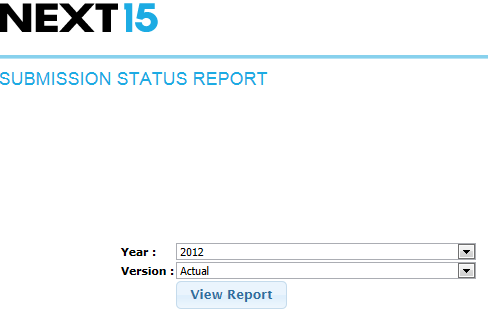
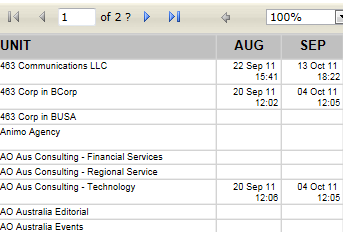
Submission Status
The Submission Status will produce a report of when the last upload for each unit you have access to for the year and version selected
Created with the Personal Edition of HelpNDoc: Full-featured EBook editor
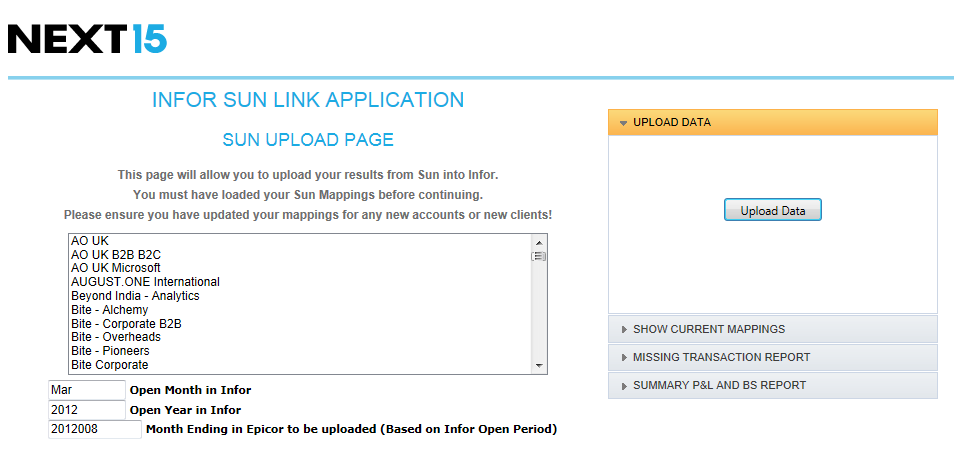
Sun Link
The Infor Sun Link page allows you to upload your Actuals results from Sun directly into Infor.
You will need to have loaded your Sun Link Mapping first before you can use this page. Details on how to create your mapping can be found here.
Within this page, you can do the following:
- Upload Results
- Run a report which shows the current mappings between Sun and Infor
- Run a missing transaction report which will show what transactions in Sun are not covered by your mappins
- Run a summary P&L and Balance Sheet report so you can compare to the reports out of Sun
See the following topics which will cover each of these
Created with the Personal Edition of HelpNDoc: Qt Help documentation made easy
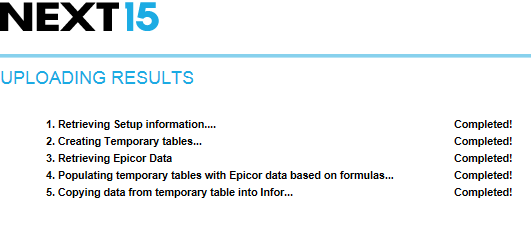
Sun Link - Upload Data
Uploading your results to Infor, just requires you to select the Units you want upload and press the Upload Data button
A new page will showing the status of the upload will appear.
If there are any issues, please contact the helpdesk
Created with the Personal Edition of HelpNDoc: Single source CHM, PDF, DOC and HTML Help creation
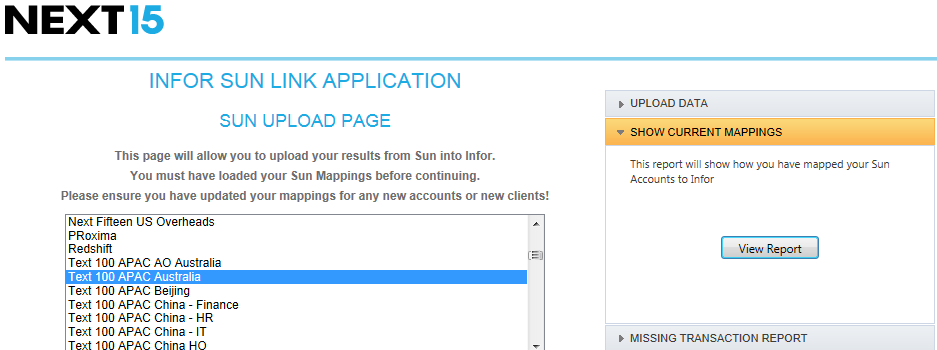
Sun Link - Show Current Mappings
This will show the current mappings you have for the unit selected
To run the report, select the Unit(s) and click the "View Report" button in the Show Current Mappings tab
Created with the Personal Edition of HelpNDoc: Easily create iPhone documentation
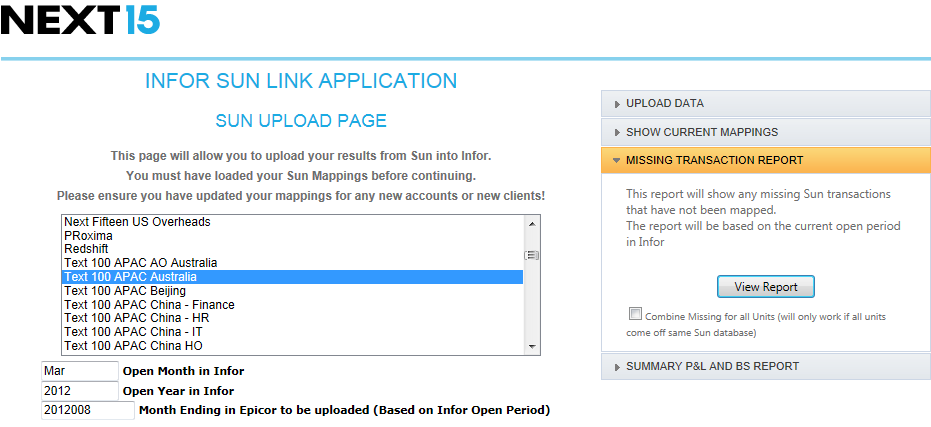
Sun Link - Missing Transaction Report
This report will show you all the accounts that are not covered by the current mappings for the current open period in Infor.
If you have a number of Infor Units which are feed from the same Sun database, in order to get a true missing transaction report, select all of these units and tick the "Combine" Missing for all Units" option.
If you do have any missing transactions, update your mapping spreadsheets to include these accounts, upload the mappings and re-run the report.
Created with the Personal Edition of HelpNDoc: Full-featured Kindle eBooks generator
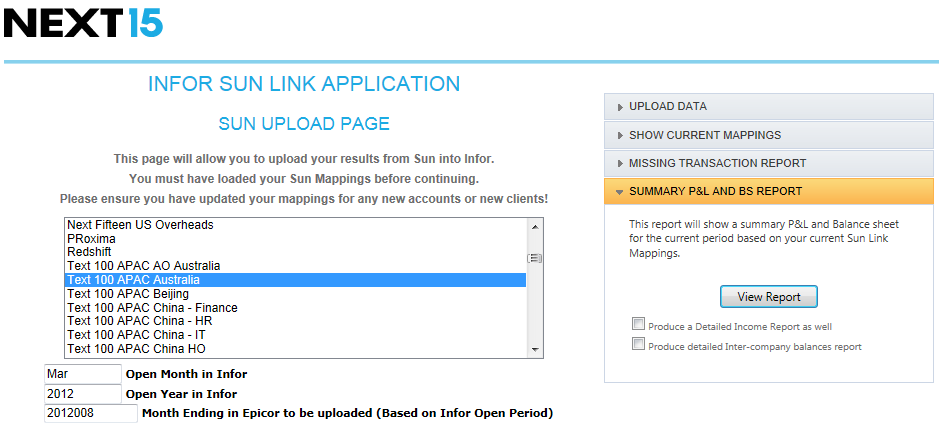
Sun Link - Summary P&L and BS Report
The Summary P&L and Balance Sheet report can be run so you can check that if you did load the results, they would match what you have in Sun.
When running this report, you also have the following options:
- Produce a detailed Income Report. This will produce a separate report which breaks the fee and project income by client
- Produce a detailed Inter-company Balance report. This will produce a separate report which breaks the Inter-company balance sheet entries by inter-company entities
To run the report, select the units, tick any of the options mentioned above (or leave unticked) and press the View Report button
Created with the Personal Edition of HelpNDoc: Create help files for the Qt Help Framework
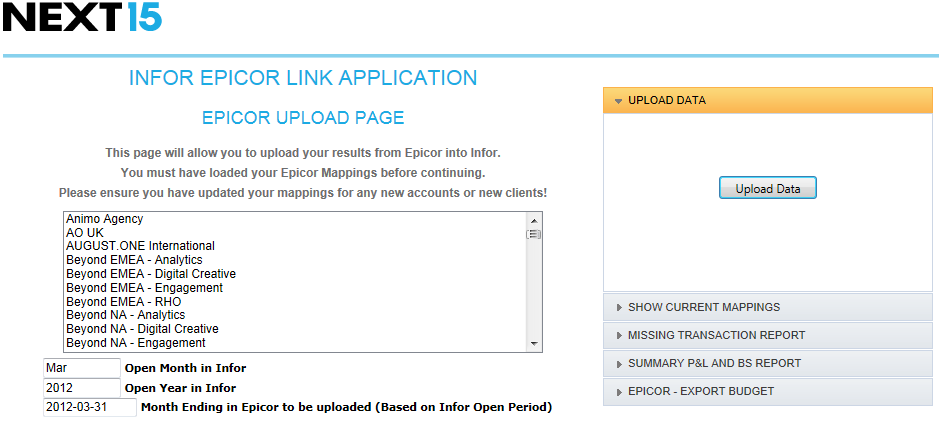
Epicor Link
The Infor Epicor Link page allows you to upload your Actuals results from Epicor directly into Infor.
You will need to have loaded your Epic Link Mapping first before you can use this page. Details on how to create your mapping can be found here.
Within this page, you can do the following:
- Upload Results
- Run a report which shows the current mappings between Epicor and Infor
- Run a missing transaction report which will show what transactions in Epicor are not covered by your mappins
- Run a summary P&L and Balance Sheet report so you can compare to the reports out of Sun
- Export Infor Budget or Reforecast back into Epicor
See the following topics which will cover each of these
Created with the Personal Edition of HelpNDoc: Free iPhone documentation generator
Upload Data
Epicor Link - Upload Data
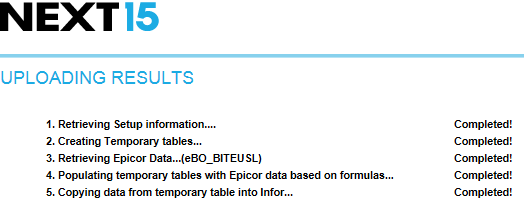
Uploading your results to Infor, just requires you to select the Units you want upload and press the Upload Data button
A new page will showing the status of the upload will appear.
If there are any issues, please contact the helpdesk
Created with the Personal Edition of HelpNDoc: Easily create iPhone documentation
Epicor Link - Show Current Mappings
This will show the current mappings you have for the unit selected
To run the report, select the Unit(s) and click the "View Report" button in the Show Current Mappings tab

Created with the Personal Edition of HelpNDoc: What is a Help Authoring tool?
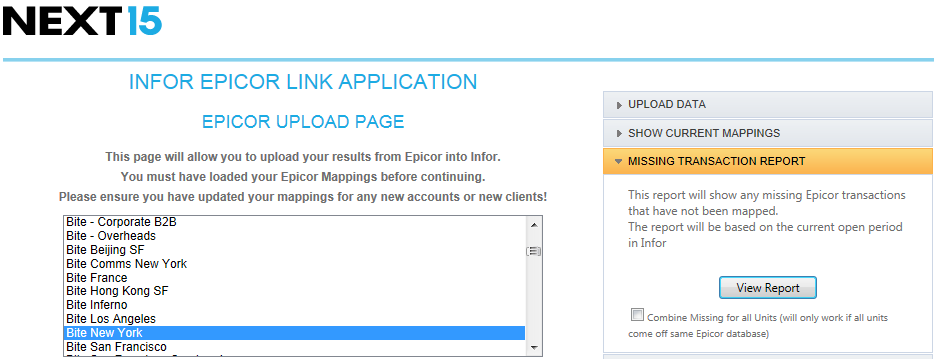
Epicor Link - Missing Transaction Report
This report will show you all the accounts that are not covered by the current mappings for the current open period in Infor.
If you have a number of Infor Units which are feed from the same Epicor database, in order to get a true missing transaction report, select all of these units and tick the "Combine" Missing for all Units" option.
If you do have any missing transactions, update your mapping spreadsheets to include these accounts, upload the mappings and re-run the report.
Created with the Personal Edition of HelpNDoc: Produce electronic books easily
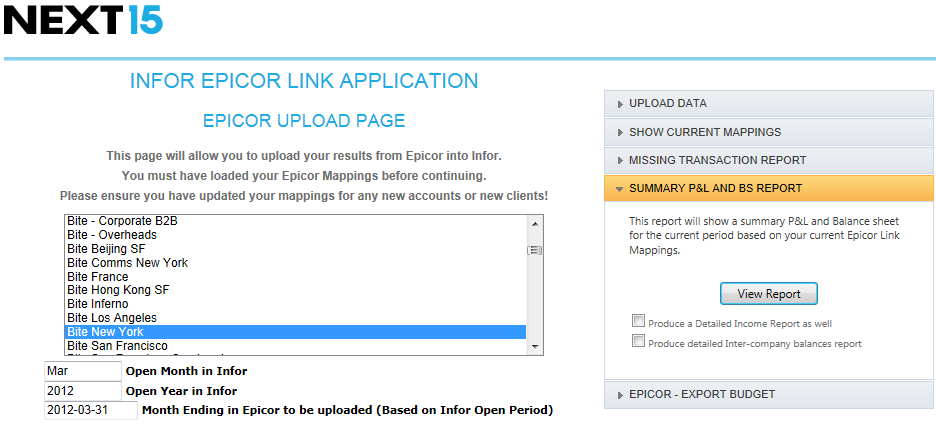
Epicor Link - Summary P&L and BS Report
The Summary P&L and Balance Sheet report can be run so you can check that if you did load the results, they would match what you have in Epicor.
When running this report, you also have the following options:
- Produce a detailed Income Report. This will produce a separate report which breaks the fee and project income by client
- Produce a detailed Inter-company Balance report. This will produce a separate report which breaks the Inter-company balance sheet entries by inter-company entities
To run the report, select the units, tick any of the options mentioned above (or leave unticked) and press the View Report button
Created with the Personal Edition of HelpNDoc: What is a Help Authoring tool?
Epicor Link - Export Budget
This option allows you to export a budget version from Infor into Epicor in order to run combined reports in FRx.
Before you can do this, you will need to setup an Epic Import Template. This is described here.
- To Export, select the Infor units you want to export
- From the Export Tab, select the Infor Version and year you want to Excport
- Select the Epicor Version you want to Import to
- Click the "Export Budget" Button
Created with the Personal Edition of HelpNDoc: Generate EPub eBooks with ease
Exchange Rates (Read Only)
This page allows you to view the exchange rates used in the system.
All Actual, Budget and Reforecast Rates are Read Only, and you will not be able to change.
Within the view, you will have access to "What-if Rates" and "What-if Rates 2". Both of these, you will be able to change in order to do you own currency scenarios.
To change, change the rate to one of these rates, update the rates, and click on the  icon in the top right of the page, to save it back to the server.
Created with the Personal Edition of HelpNDoc: Easy EBook and documentation generator
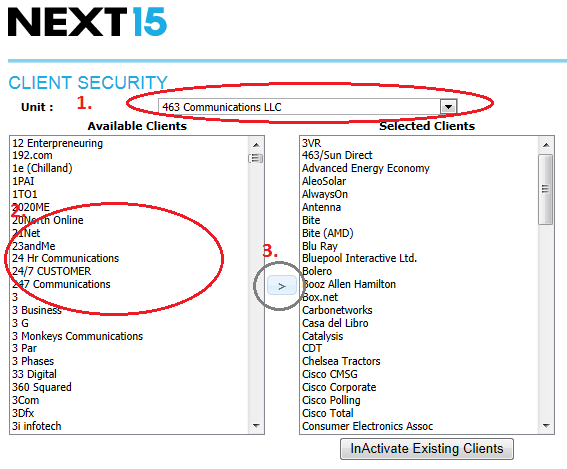
Client Security
This page allows to you set which clients are assigned to your unit.
If you cannot find your client in the list, please email the helpdesk with the name of the new client you are wanting to add. The helpdesk will respond once it is created.
- Select the Unit you want to add clients to
- Select the Clients from the left Available Clients list
- Click the ">" button to move them to the Selected list
- Repeat as needed
Created with the Personal Edition of HelpNDoc: Produce online help for Qt applications
Inactivate Existing Clients
This page allows to set some of your clients as Inactive.
This will stop the client from being downloaded into a blank template (it will not remove the client from a spreadsheet if it has already been previously downloaded)
You should only inactivate a client if it has had no income within the last 12 months.
- To inactivate, select the Unit from the dropdown list
- Click the "Inactivate Existing Clients" button
- From the left, active client list, select the clients you want to inactivate and click the ">" button
- If you want to activate a previously inactive client, select the client from the right box, and click the "<" button
- Repeat as needed
Created with the Personal Edition of HelpNDoc: Easily create CHM Help documents
Document Management
Document Management
This is a separate application to Infor which allows you to save documents/spreadsheets to a central location which can be shared with Group Finance. This was primarily created for loading of your Stat packs although it doesn't to be limited to this.
Access to this application can be made through this link and you should enter your Infor username and password when prompted.
Please contact the helpdesk if you have access denied.
Created with the Personal Edition of HelpNDoc: Easily create EPub books
Uploading Files
Uploading a file
To upload a new file, click on the new document link

Click on the Browse button and select the file you want to upload
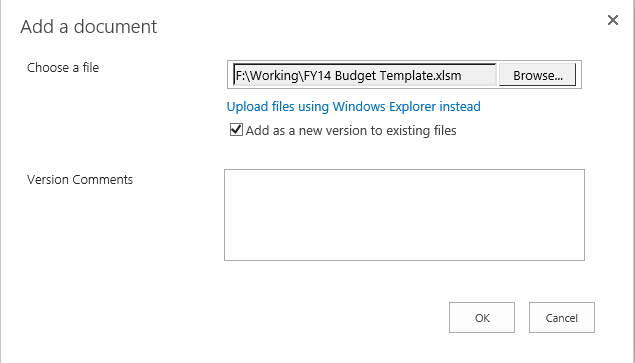
You can enter comments if you like and then press the OK button
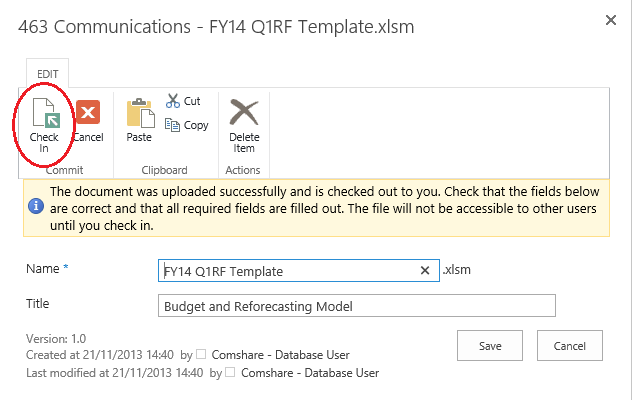
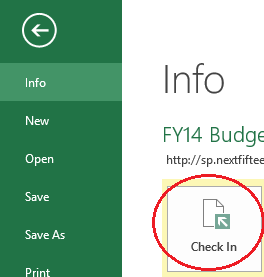
Once uploaded, ensure you click the "Check In" button so that it accessible by other people
Created with the Personal Edition of HelpNDoc: Easily create CHM Help documents
Amending existing files
You can amend existing files by checking out the file first, making changes and then checking it back in.
When checking back in, the system will keep a copy of the previous version which you can get a copy of if you wished.
Check Out
To check out a file, click on the file and open in Microsoft Office (you will be prompted for your Infor username and password)
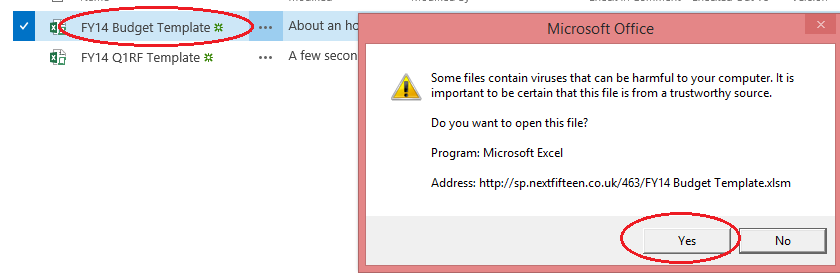
Once opened in Microsoft Office, you will be given the option to Check the file out

Check In
Once you have finished amending the file, you can check the file back in by clicking the "Check In" button in the file menu
Alternatively you can re-upload your file with the same name and copy over the existing version.
Created with the Personal Edition of HelpNDoc: Free help authoring environment
Reporting
Reporting in Infor comes in three forms:
- Production Reports - these are fixed layout reports e.g. Profit and Loss report, Balance Sheet, Top 10 clients etc.
- Pivot Reports - flexible reports which function a bit like pivot reports in Excel, which easily allows viewing of data and exporting to Excel
- Reporting Add-In - based around creating views in the view manager, then importing into Excel using the Add-In. This allows you to format the data as required
Created with the Personal Edition of HelpNDoc: Create help files for the Qt Help Framework
Production Reports
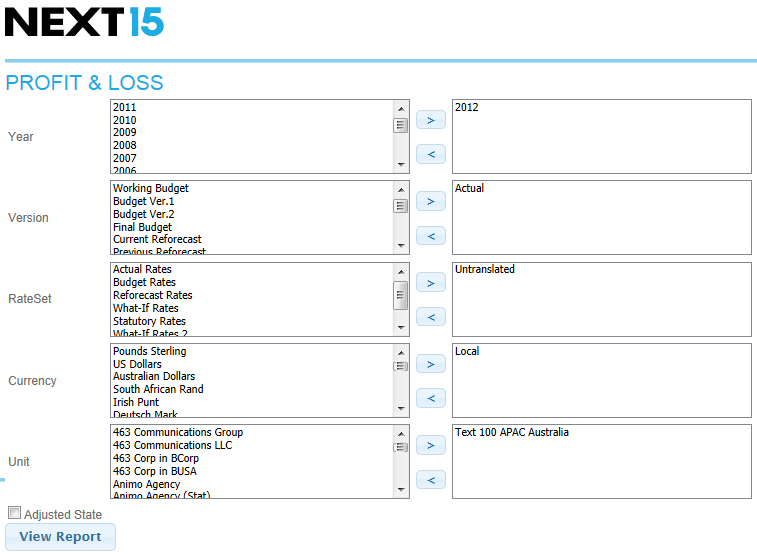
Available from the Reports Menu, select the report you are wanting to view

Select the options you to report on by either highlighting and clicking the ">" button or double click on the item to move to the right
Click the "View Report" Button when done

Once the report is previewed, you can print the report or export to one of the formats shown.
Created with the Personal Edition of HelpNDoc: Easily create Help documents
Pivot Reports
Pivot reports is a flexible tool which allows you to easily set up basic reports from the system, and export them into Excel.
The Reports are made up of the following fields:
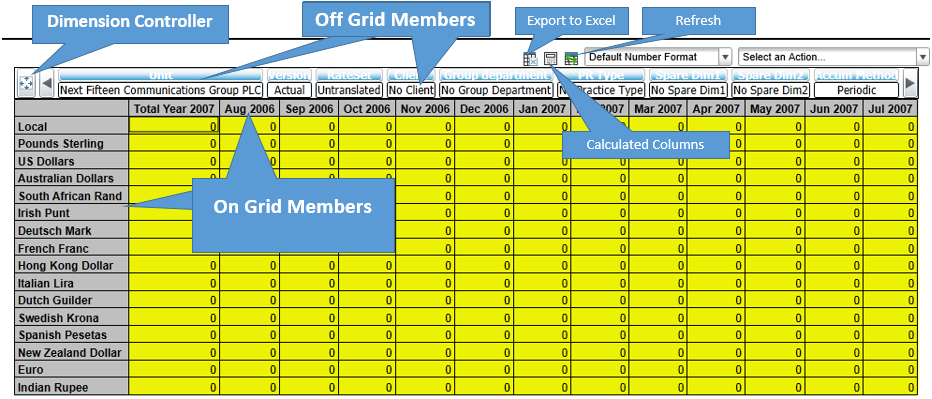
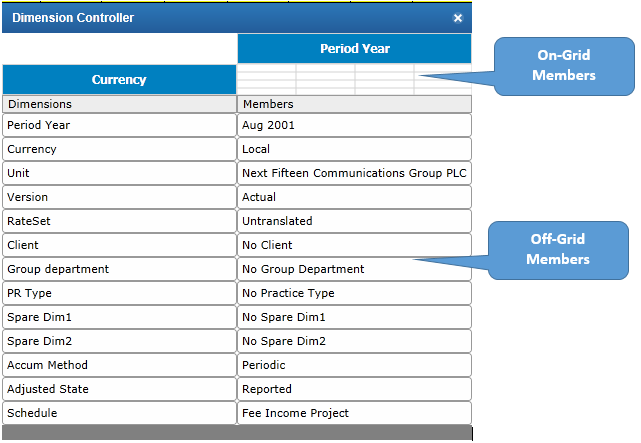
- On-Grid Members - these are the dimensions which make up what is shown within the Grid.
- Off-Grid Members - these are like filters, and filter what is shown on the Grid
Both On and Off Grid members are setup and maintained using the Dimension Controller
NOTE: Pivot Reports can take a little time to get use to, so don't be afraid you have a go. You cannot break the system using these reports, so give it a go!
Created with the Personal Edition of HelpNDoc: Easily create Web Help sites
Dimension Controller
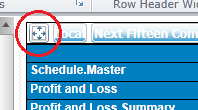
The Dimension Controller is reached by clicking this button on the view 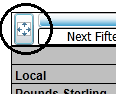
Created with the Personal Edition of HelpNDoc: Write EPub books for the iPad
Selecting On-Grid Members
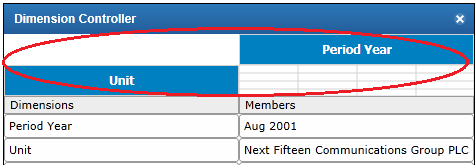
As part of creating a Pivot Report, you will need to decide what you want on your grid i.e. what dimensions you want going down the rows, and which ones going across the dimensions.
While you need to have a least one going down, and one across, you could have more. For example, you may what Schedule Lines going down the rows, and Month and Version across the columns, or Unit and Versions etc.
To get, dimensions On-Grid, you just need to click and drag the dimensions, from the Off-Grid section of the dimension controller, to the On-Grid section.
To help illustrate this, we have prepared a brief video showing the different ways of doing this.

Now that you have selected the structure of what is on the Grid, you now need to choose the Members which are to shown, for example, you have selected the Version Dimension on the Grid, but you only want the Actuals and Final Budget members to show.
Click on the On Grid Dimension you want to change
Remove the existing selection by selecting Delete All as illustrated
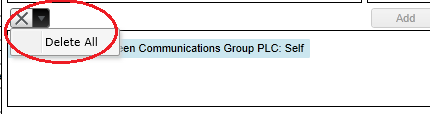
Select the Member(s) you want and Click the Add button
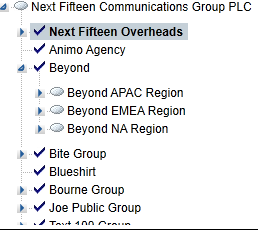
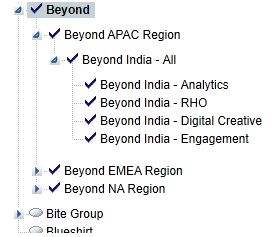
You can do this individually which might be appropriate for some Dimensions such as Version, however in some cases you might want to select all options under a Dimension Tree, for example, all months in FY13.
In these cases, you use the Related Members

Self |
Including Self, will include the member being selected. You might not want self to be included for example in the Schedule line dimension. You might want all the members under the P&L Summary FY08, but not the grouping name |
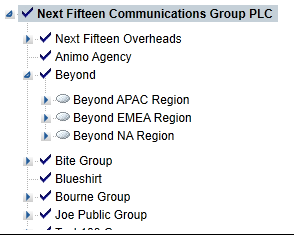
All Members at Same Level |
Only selects the members on the same level. Any member below is ignored
|
All Members Members Below |
Select all members below the one selected
|
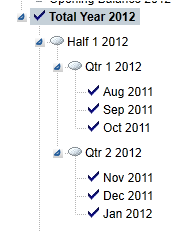
Leaf Members Below |
Selects the lowest level Members
|
Next x level(s) Below |
In this Example, have selected the parent Next 15 unit and only 1 level below. Any level below was not selected
|
Click below to see a brief video demonstrating some of these selections

Created with the Personal Edition of HelpNDoc: Create iPhone web-based documentation
Selecting Off-Grid Members
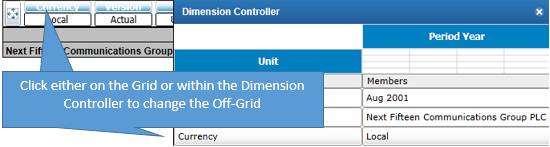
Off-Grid members are an important part of the view and are used as filters as to what is shown on the Grid.
For example, setting the currency and rateset e.g. US Dollars at Budget Rates. Periodic or Year to Date amounts etc
You can change these, either through the Dimension Controller or by clicking on the item in the Grid
Once you have select the Member you want and press OK (you can only choose one)
Repeat as needed
A COUPLE OF NOTES WITH OFF-GRID SELECTIONS
- When choosing currencies and ratesets, Local and untranslated can only be used together and only on a leaf unit. A leaf unit is the lowest level unit in the hierarchy. If not, then you will need to use an actual currency and rateset e.g. Pounds Sterling and Actual Rates
- If Clients are not "On-Grid", the Off-Grid must be "No Client"
- Group Department Dimension should be "No Group Department"
- PR Type should be "No Practice Type"
Created with the Personal Edition of HelpNDoc: Easy EPub and documentation editor
Saving a Report
Once you have set up a report in a certain way, you can save the report so that you can recall at another time
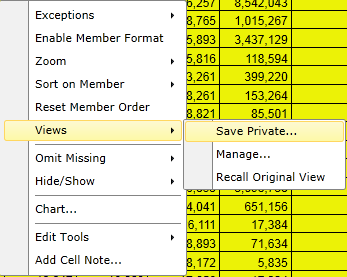
To save a report, right click on the Report and select View/Save Private...
Give it a Name. You can also give it a description
Share? - You can click the Share button if you want other people to have access to this report. Everyone will then be able to view the report created although users security will apply i.e. if they don't have access to the units in your report, no data will be returned.
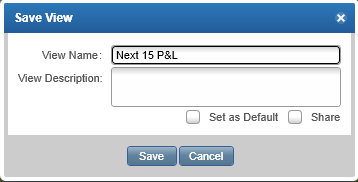
Press Save
Created with the Personal Edition of HelpNDoc: Easily create Web Help sites
Recalling a Saved Report
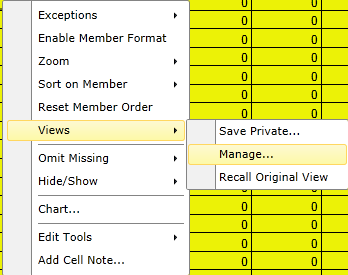
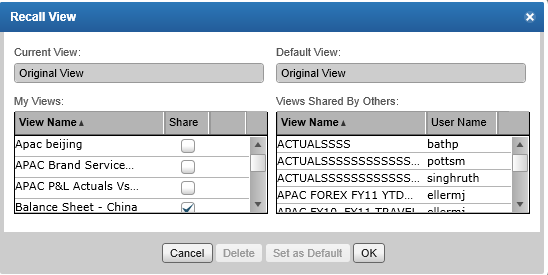
To recall a previously saved report, or to open a shared report someone has created, right click on the report and select Views/Manage...
Depending on whether you are recalling one of your own reports or someone's shared reports, find the report in either the right of left list, select it and Press OK
Created with the Personal Edition of HelpNDoc: Easy EBook and documentation generator
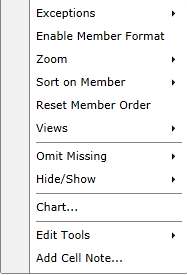
Right Click Menu Options
If you right click on a view, you will see a couple of options available.
This briefly goes over some of these.
Created with the Personal Edition of HelpNDoc: Single source CHM, PDF, DOC and HTML Help creation
Report Exceptions
Created with the Personal Edition of HelpNDoc: Easily create EBooks
Enable Member Format
Enable Member Format
The Enable Member Format command activates a formatting window where you can change the number format, font, background colour, and foreground colour. You can also define cell borders. The formatting window can be deactivated when not in use.
To enable member format:
- Right-click the grid and select Enable Member Format. A check mark appears next to the command name when it is enabled.
- Select the row or column that you want to change, then hover the mouse over the header until the formatting window opens.
- Select the element to format. You can select Headers & Data, Data Area, or Headers.
- Use the formatting window to make your changes.
- Select Private Views > Save to save your changes to a private view.
Created with the Personal Edition of HelpNDoc: Create help files for the Qt Help Framework
Zoom
You can zoom in and out on the grid. The dimension bar is not affected.
- Right-click the grid and select Zoom.
- Drag the slider to enlarge the view. The grid resizes immediately.
- Click off the slider to return to the view.
Click Reset to return to the original size.
Created with the Personal Edition of HelpNDoc: Free PDF documentation generator
Sort on Member / Remove Sorting
You can sort rows or columns in the grid.
- Right-click a row or column in the grid and select Sort on Member.
- Select from:
- Ascending / Break Hierarchy. This command sorts all cells numerically in ascending order.
- Ascending / Preserve Hierarchy. This command sorts cells in ascending order within their hierarchy. For example: France, Germany, and Italy would be sorted within the Europe hierarchy, while Japan, China, and Singapore would be sorted within the Asia hierarchy.
- Descending / Break Hierarchy. This command sorts all cells numerically in descending order.
- Descending / Preserve Hierarchy. This command sorts cells in descending order within their hierarchy. For example: France, Germany, and Italy would be sorted within the Europe hierarchy, while Japan, China, and Singapore would be sorted within the Asia hierarchy.
To delete a sort, right-click the row or column and select Remove Sorting.
Created with the Personal Edition of HelpNDoc: Easily create iPhone documentation
Omit Missing
You can hide rows or columns that contain no data without removing them from the database using the Omit Missing command.
Right-click anywhere in a data area and select Omit Missing.
Select from:
- By Column. This command hides all columns with no data.
- By Row. This command hides all rows with no data.
- Both Row and Column. This command hides all rows and columns with no data.
- None. This command restores any previously hidden columns or rows with no data.
If you export to Excel, the Excel report respects the current setting for this command.
Created with the Personal Edition of HelpNDoc: Full-featured multi-format Help generator
Cut, Copy and Paste
The Cut and Copy commands add the contents of the selected cells to the Clipboard for pasting into another area of the grid.
The Paste command adds the Clipboard contents to the highlighted area on the grid.
The Paste command is enabled if there are contents in the Clipboard.
Contents are removed from the source cells after the cut data is pasted; copied data remains in the source cells after being pasted to the destination cells.
Created with the Personal Edition of HelpNDoc: Qt Help documentation made easy
Add Cell Note
The Add Cell Note command lets you add a comment to a cell.
Right-click the cell you want to comment on and select Add Cell Note.
Specify the text to use in the note and close the note.
A red indicator displays in a cell when a note is present.
To view the note, point the mouse at the red triangle.
The user name, date, and time display in the window when you view it.
You can edit the note directly from the window or delete the note by removing the text and closing the window.
You can resize a note by clicking and dragging on the lower right corner.
Created with the Personal Edition of HelpNDoc: Full-featured Documentation generator
Reporting Add-In
The Reporting Add-In combines Views created using the View Manager with Excel.
This will allow you to create a more tailored look to your report than you would otherwise be able to get out of Infor using the Pivot Reports.
This manual will go through the steps on how to add a view to a spreadsheet, and how we would recommend using the data.
The first step is creating a view, which is covered in this section.
Created with the Personal Edition of HelpNDoc: Generate Kindle eBooks with ease
Adding a View to a Spreadsheet
Open a new spreadsheet and rename the Sheet to "Data" (or something descriptive)
Click on the design icon as shown below within the Add-Ins tab (if you do not have these icons, please follow the steps outlined here)

Click on the + icon next to the design icon and login if you haven't already, using your Infor username and password
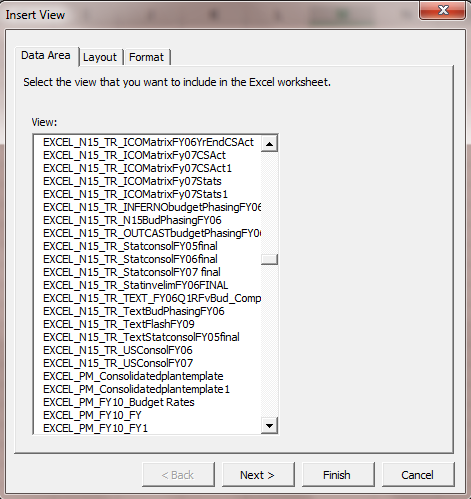
Select the name of the view from the list and click the Finish Button (We generally ignore the options on the other tab as they don't really add anything)
Once the view has been added to the spreadsheet, you can click on the design icon again to come out of design mode
Created with the Personal Edition of HelpNDoc: Easy to use tool to create HTML Help files and Help web sites
Changing the Members
In general, the views in Excel work the same as Pivot Reports within the Infor Website and it is possible to change anything on the view, although with Excel Views, it is not normal to change what is on the Grid, although it is common that you will want to change the Month, or currency.
To do this, you can either use the Dimension Controller which is found clicking on this icon  in the Add-Ins tab, of you can just double click on the dimension in the worksheet
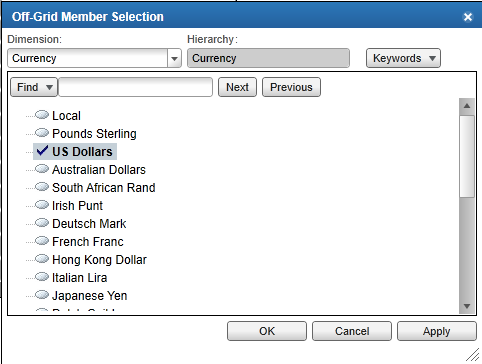
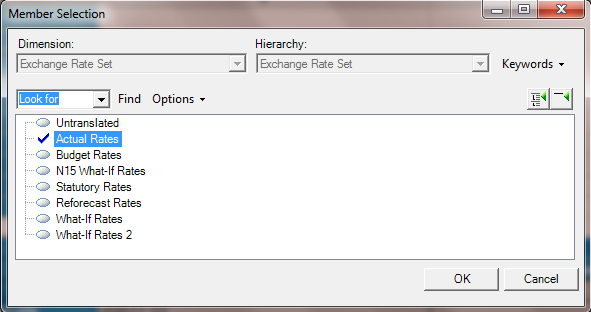
This will bring up the Member Selection form which you can then choose the Member you want and press OK
After making your changes, you may need to refresh your sheet, which you can do by click the refresh icon  in the Add-Ins tab
Created with the Personal Edition of HelpNDoc: Produce electronic books easily
Setting up the Formulas
This briefly goes through how Next 15 recommends you set up your formulas to present the data within the view.
Our method takes into account that structures change based on people's access rights and new units created.
This way, the maintenance of the spreadsheet is kept to the minimum.
For the basis of this example, we will have Version and Unit across the columns and the P&L down the rows

Step 1: Create a Named Range for all the Units
In this example, we would create a named range from A13 to the last column which holds a unit
To create a Named Range, click on the Formulas Tab
Click on "Define Names"
Give it the name "Units"
In the Refers To box, select all the items in Row 13 starting from A13
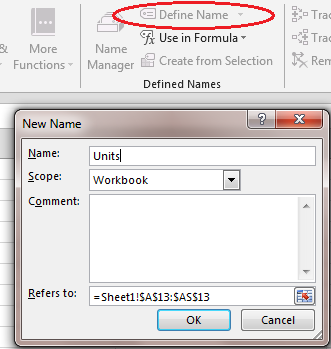
Press OK
Step 2: Create a new sheet and give it a name
Step 3: In the new sheet, using the named range calculated above, enter formulas to work out how many columns to get to the unit you are after
For this, here are some useful formulas
- MATCH(xx,Units,0)-1 : Returns the number of columns in the named range, "Units", to get to xx
- COLUMNS(Units)-1 : Returns the number of columns in the named range "Units"
- OFFSET(Start, Rows, Columns)
Taking these formulas, and the view above, I started entering these entries. Ultimately I will hide rows 3 -10, but at the moment they are there for demonstration (this is where things getting a little complicated, but bear with it, as there are advantages of doing it this way)
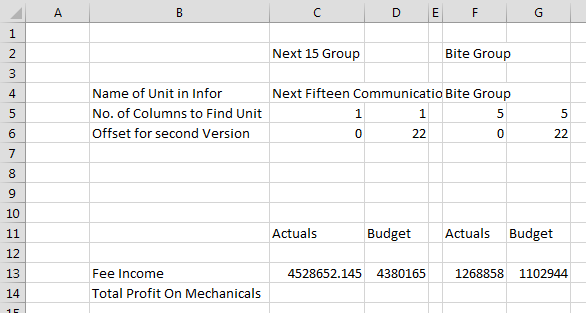
Cell C4 - I entered the name of the unit exactly as it is written in the Data sheet
Cell C5 - The formula entered is "=MATCH(C4,Units,0)-1". This tells me that Next Fifteen Communications Group plc, is the 1st Column in the list
Cell C6 - this is just zero, as Actuals is the first Version returned in my view, I don't need to do anything else
Cell D5 - The formula is "=C4". Just want this to match the previous column
Cell D6 - The formula is "=(COLUMNS(Units)-1)/2"
This formula is trying to find out how many columns do I need to add to get the next version's numbers.
Remember, in this view, we have two versions being returned
We know that for each version, the same number of units be be returned and in the same order
So here, we are saying for each version, there are 22 units. So to get to the next version, I need to go an extra 22 columns
We now know how many columns we need to offset to get to the numbers for this unit
Cell C13 - Formula is "=OFFSET(Data!$A14,0,SUM(C5:C6))". The same formula applies across all columns. Data$A14 is the Fee Income line in the Data Sheet we created above, and then offset by the number of columns in rows 5 & 6
That's it really. The rest is just formatting.
The main thing to remember is ensuring the Units range is updated for any new units added or for someone who doesn't have access to the same units as you do
Created with the Personal Edition of HelpNDoc: What is a Help Authoring tool?
View Manager
View Manager is used to create the views used within the Infor Reporting Add-in.
In previous versions, this was only available through Citrix however this has now moved to the web and can be accessed under the Setup menu

Created with the Personal Edition of HelpNDoc: Produce Kindle eBooks easily
Create a new view
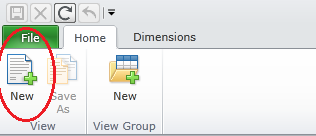
To create a new View, click on the New icon as shown below
Naming of a view
We would ask that you follow the following naming convention when naming your view
EXCEL_BRAND_YOUR_INTIALS_NAME OF VIEW
e.g. EXCEL_N15_RM_AnythingIlike
EXCEL_T100_SB_ActualvsBudget
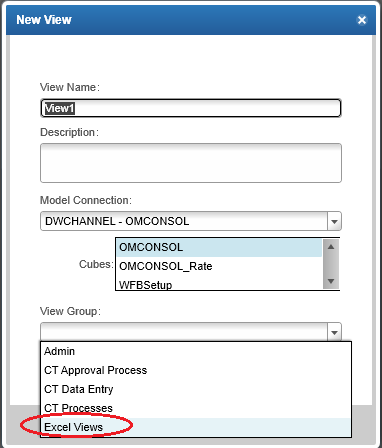
Model Connection = "DWCHANNEL - OMCONSOL"
Cubes = "OMCONSOL"
View Group = "Excel Views"
Press OK
Created with the Personal Edition of HelpNDoc: Create help files for the Qt Help Framework
Selecting On-Grid Members
As part of creating a View, you will need to decide what you want on your grid i.e. what dimensions you want going down the rows, and which ones going across the dimensions.
While you need to have a least one going down, and one across, you could have more. For example, you may what Schedule Lines going down the rows, and Month and Version across the columns, or Unit and Versions etc.
First you need to open the Dimension Controller by clicking in the corner of view as shown below
To get dimensions On-Grid, you just need to click and drag the dimensions, from the Off-Grid section of the dimension controller, to the On-Grid section.
To help illustrate this, we have prepared a brief video showing the different ways of doing this.
Now that you have selected the structure of what is on the Grid, you now need to choose the Members which are to shown, for example, you have selected the Version Dimension on the Grid, but you only want the Actuals and Final Budget members to show.
Click on the On Grid Dimension you want to change
Remove the existing selection by selecting Delete All as illustrated
Select the Member(s) you want and Click the Add button
You can do this individually which might be appropriate for some Dimensions such as Version, however in some cases you might want to select all options under a Dimension Tree, for example, all months in FY13.
In these cases, you use the Related Members
Self |
Including Self, will include the member being selected. You might not want self to be included for example in the Schedule line dimension. You might want all the members under the P&L Summary FY08, but not the grouping name |
All Members at Same Level |
Only selects the members on the same level. Any member below is ignored
|
All Members Members Below |
Select all members below the one selected
|
Leaf Members Below |
Selects the lowest level Members
|
Next x level(s) Below |
In this Example, have selected the parent Next 15 unit and only 1 level below. Any level below was not selected
|
Click below to see a brief video demonstrating some of these selections
Created with the Personal Edition of HelpNDoc: Create help files for the Qt Help Framework
Moving items on-grid
This video briefly shows how to move members onto the grid.
Generally you just need to click and drag the item onto the area of the grid you want. Take notice of the change of icons which show whether the item is to replace, swap or move beside,
To remove an item off the grid, click and drag to the bottom of the form until you see the eraser icon.
Created with the Personal Edition of HelpNDoc: Easily create Help documents
On-Grid member selection
This video briefly shows each selection option and what that means
Created with the Personal Edition of HelpNDoc: Easily create Qt Help files
Selecting Members
Selecting Members
Member selection comes down to four types:
- Allowed Members - these are the top group of members that the rest of the selections are restricted by. So if you restricted the allowed units, then the on-grid, off-grid and alternate off-grid members will be limited as well.
- On-Grid Members - these are the members which will show on the Grid
- Off-Grid Members - these are the filters applied to the grid. For example, you might filter by currency and rateset. This is set my the off-grid member
- Alternate Off-Grid Member - The default off-grid member is applied above, however, in certain circumstances, you may want a different member to be applied. An example could be for Versions. You may want the Final Budget be shown at Budget Rates and Current Reforecast at Reforecast rate, irrespective of the Rate select in the Off-Grid member. This can be set up here
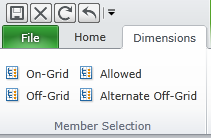
Each of these selections can be made in the Member Selection group of the Dimension toolbar
Created with the Personal Edition of HelpNDoc: Easily create Qt Help files
Allowed Members
As mentioned in the previous page, Allowed Members are the top group of members that the rest of the selections are restricted by.
So if you restricted the allowed units, then the on-grid, off-grid and alternate off-grid members will be limited as well.
Normally I wouldn't worry about restricting the members, but if you do, follow these steps.
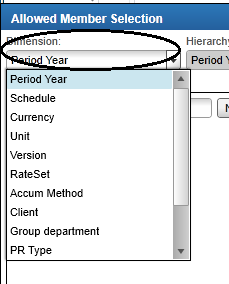
- Click on the Allowed Members option
- Select the Dimension you want to restrict
- Remove the existing selection by selecting Delete All as illustrated
- Select the Member(s) you want and Click the Add button
You can do this individually which might be appropriate for some Dimensions such as Version, however in some cases you might want to select all options under a Dimension Tree, for example, all months in FY13.
In these cases, you use the Related Members
Self |
Including Self, will include the member being selected. You might not want self to be included for example in the Schedule line dimension. You might want all the members under the P&L Summary FY08, but not the grouping name |
All Members at Same Level |
Only selects the members on the same level. Any member below is ignored
|
All Members Members Below |
Select all members below the one selected
|
Leaf Members Below |
Selects the lowest level Members
|
Next x level(s) Below |
In this Example, have selected the parent Next 15 unit and only 1 level below. Any level below was not selected
|
Created with the Personal Edition of HelpNDoc: Easy EBook and documentation generator
On-Grid Members
Selecting On-Grid Members is the same as for the Pivot Reports and is also covered here
Created with the Personal Edition of HelpNDoc: Create HTML Help, DOC, PDF and print manuals from 1 single source
Off-Grid Members
Off-Grid members are an important part of the view and are used as filters as to what is shown on the Grid.
For example, setting the currency and rateset e.g. US Dollars at Budget Rates. Periodic or Year to Date amounts etc
- Click on the Off-Grid Members option
- Select the Dimension you want to set
- Once you have select the Member you want and press OK (you can only choose one)
- Repeat as needed
A COUPLE OF NOTES WITH OFF-GRID SELECTIONS
- When choosing currencies and ratesets, Local and untranslated can only be used together and only on a leaf unit. A leaf unit is the lowest level unit in the hierarchy. If not, then you will need to use an actual currency and rateset e.g. Pounds Sterling and Actual Rates
- If Clients are not "On-Grid", the Off-Grid must be "No Client"
- Group Department Dimension should be "No Group Department"
- PR Type should be "No Practice Type"
Created with the Personal Edition of HelpNDoc: Free EBook and documentation generator
Alternate Off-Grid Members
Alternate Off-Grid members allows you to apply a different member to a dimension that the one selected.
An example could be for Versions. You may want the Final Budget be shown at Budget Rates and Current Reforecast at Reforecast rate, irrespective of the Rate select in the Off-Grid member.
NOTE: Alternate Off-Grid Members will only work if the Dimension you are basing this off e.g. Versions, in On-Grid, and is on the most outer layer.
To illustrate this, taking the Version scenario above:

This example would work as the Version Dimension is on Grid, and is on the most outer layer

This example would not work as although the version is On-Grid, it is NOT the most outer layer (Unit is)

This example would not work, as Version is not On-Grid
To setup up the Alternate Off-Grid, follow these steps:
- Click on the Alternate Off-Grid option in the Dimension tab
- You will be presented with a form like this split into three sections
- The On-Grid section. This is where you would choose the On-Grid member e.g. Version
- The Off-Grid section. In our example, we would select Rateset
- Existing links. Will list the links made for this View
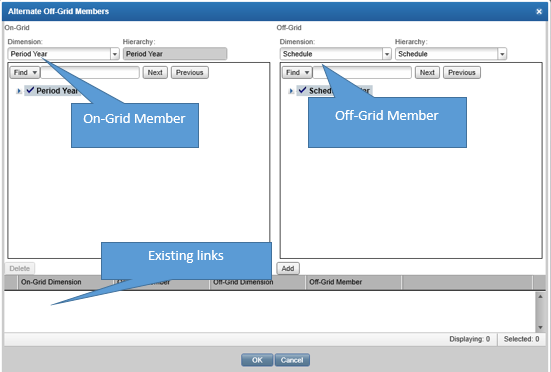
- Select the On-Grid Dimension you want to use e.g. Versions
- Select the Off-Grid Dimension you want to link to e.g. Rateset
- Select the On-Grid Member and linked Off-Grid Member and then select the Add button. Repeat as needed
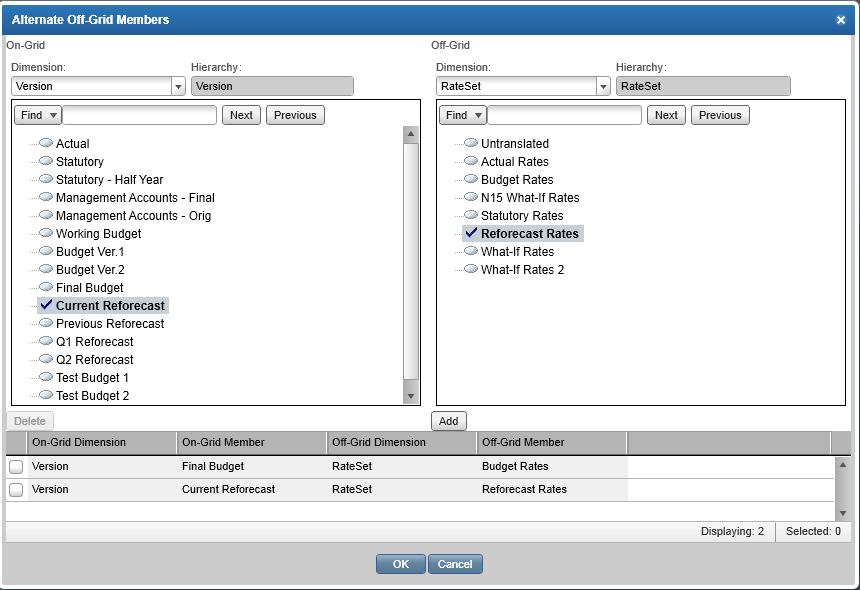
Created with the Personal Edition of HelpNDoc: Create help files for the Qt Help Framework
Copying an Existing View
If you want to copy an existing view e.g. save on setup time etc
- Open the view you want to copy
- Click on the File Tab
- Select "Save View As"
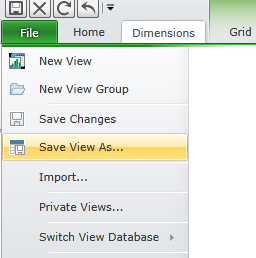
- Give the View a new Name (ensure you following existing naming conventions)
- Press OK
Created with the Personal Edition of HelpNDoc: Free Kindle producer
Creating a Report from a Pivot Report
In this topic we talked about saving a Pivot Report which you can also share with other users.
When saving a Pivot Report, the system saves the information as a "Private View".
If you later want to use this to create an Excel report from it, you would either need to create a new View using the View Manager, or "Promote" the Private View to a Full View. At which point, it will be available through the Reporting Add-In.
To Promote a private view, follow these steps:
- Within View Manager, click File/Private Views

- The Private Views form will load (there are A LOT of private views, so it will take time)
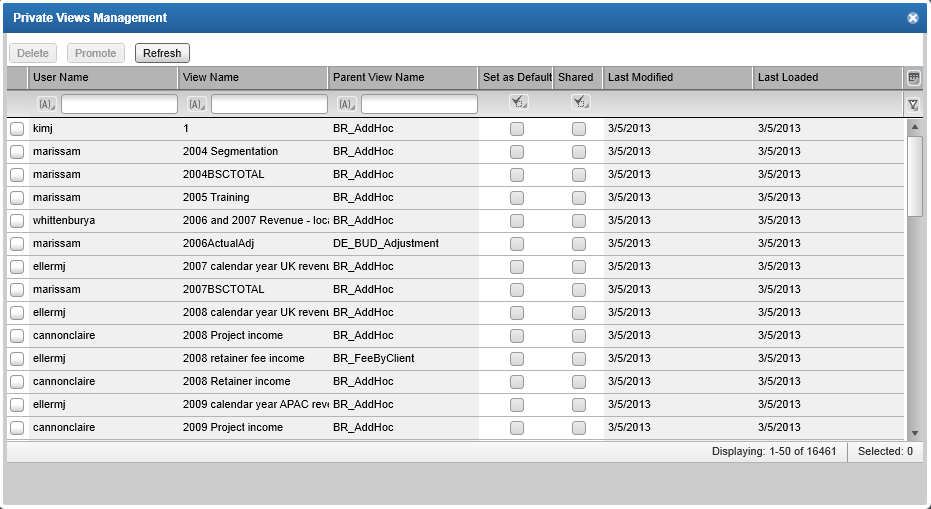
- You will need to filter in order to find your view which you can do by your Infor User Name, or View Name if you know what you called it when you saved it. Enter your filter and then click on the filter icon on the right of the form and select Apply Filter

- Once you have found your view, tick the box beside it and click the "Promote" button at the top
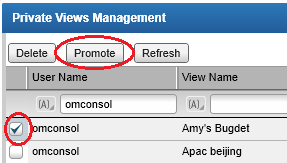
- Give a new name following the View naming convention mentioned here, and add it to the Excel Views group. Press OK
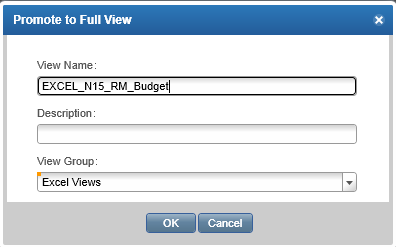
Created with the Personal Edition of HelpNDoc: Create iPhone web-based documentation
Cell Based Reporting
Cell Based Reporting is the named given to an Excel based add-in which is optimized for Excel proficient users who want to build and format their own reports.
Information is delivered to Excel via a dataset defined locally within each workbook. No access to view manager is needed.
This format supports a highly flexible layout where you can insert entire blocks of data at once or cell by cell, as the data is retrieved from the dataset based on individual cell formulas.
The data within the dataset is stored with the spreadsheet and can be updated at any time.
Depending on how you have configured you dataset, you can change members while offline and data will be updated accordingly.
Users do not have to have an Infor user name to view the data offline, although one would be required if they need refresh the data (due to limitations on the number of licenses we hold, it is recommended that the refresh of data is done by finance)
Created with the Personal Edition of HelpNDoc: Produce online help for Qt applications
CBR - Download template
Cell Based Reporting - Download template
To get started, you need to download and open the cell based reporting template from this link
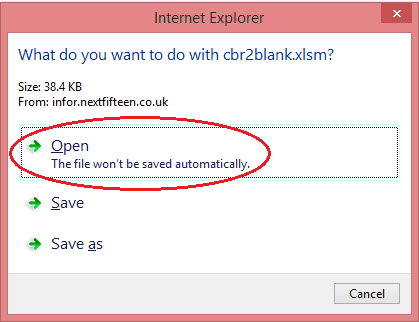
When you first open the spreadsheet, it should start installing the client software required for these templates. Click on the Install button to start installing
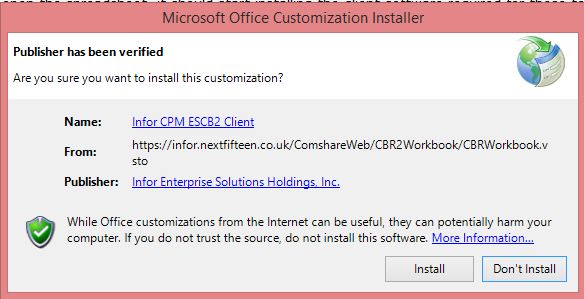
Next, save the file to your local computer.
Sometimes you might get an error message during this process. This is ok and normally resolved by closing Excel and re-opening the spreadsheet. Ensure you enable all content
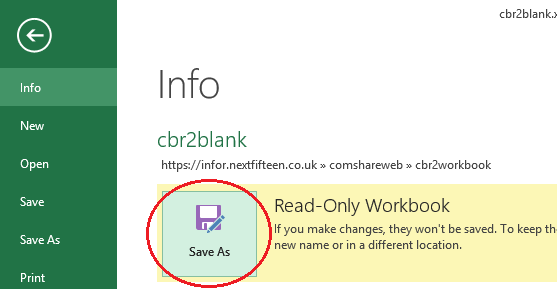
Created with the Personal Edition of HelpNDoc: Easily create EBooks
CBR - Excel Options
Cell Based Reporting - Excel Options
Once the software has been installed and you first open the spreadsheet, you should see the following options available
Document Actions - this where you define the dataset and inserting it into the spreadsheet
Add-Ins - In the Add-Ins menu, you should see a couple of new options available. The main one being the refresh data icon. You also have the design menu which gives you the same options as in the Document Actions
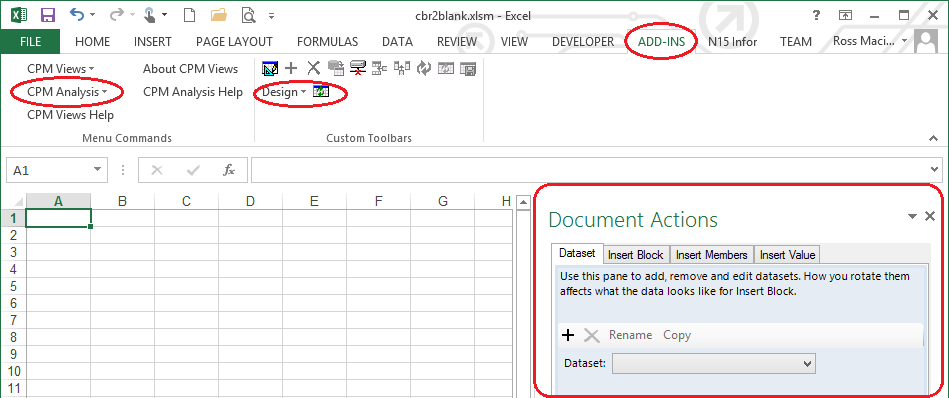
Created with the Personal Edition of HelpNDoc: Create cross-platform Qt Help files
Cell Based Reporting - Dataset
A dataset is a term given for a collection of data which can be used in the spreadsheet. You determine what that dataset will consist of and how it will be shown on your report
You can change the dataset at any time without generally affecting your reports.
- To create a dataset, click on the "+" symbol
- Enter your Infor User Name and Password and press OK
- Give your Dataset a name. This can be anything although if you plan to have more than one dataset in the workbook, it may be easier to give it a name that is relevant
- Press OK
The Dataset form should look something like this
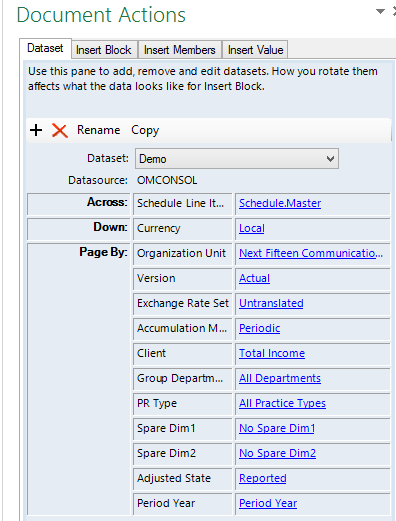
Next set what the key item will be across the page and down the page. Unlike the view manager, you can not have more than one dimension across the top (or down), however this doesn't mean you cannot get to this within your report. Here, you just need to select the main items you will use.
For example, I want to create a report which shows a P&L for multiple units which includes Actuals and Budget numbers. In this case I would choose Unit across the top and schedule line items going down.
To move dimensions up to the Across and Down boxes, just click and drag the name of the dimension up to the section
Now that you have the basic structure, you now need to choose the items in the dataset. Basically this will be everything you want, or may want in your report.
Please ensure the following Dimensions have been set as follows:
- Client dimension - This needs to be changed to "No Client"
- Group Departments - This needs to be change to "No Group Department"
- PR Type - This needs to be changed to "No Practice Type"
In the example below, I want to report Actuals and Budgets for each unit, and I want the Actuals at Actual Rates and Budget at Budget Rates for a month in FY12
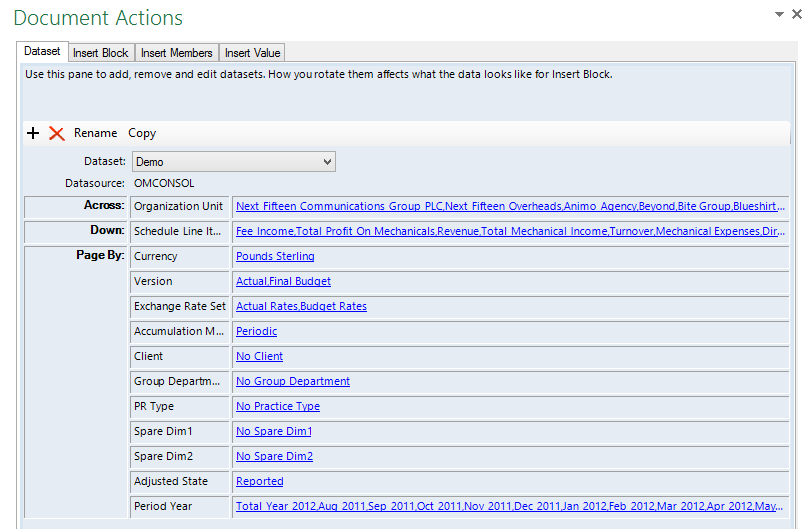
Created with the Personal Edition of HelpNDoc: Free CHM Help documentation generator
Cell Based Reporting - Dataset
Once you have created your Dataset, you now need to insert the data into the spreadsheet
The easiest way to do this, is choosing the "Insert Block" tab
By default, any page member which has more than one item in the dataset will have the checkbox "Display" ticked. Do not change this.
Click the Insert button
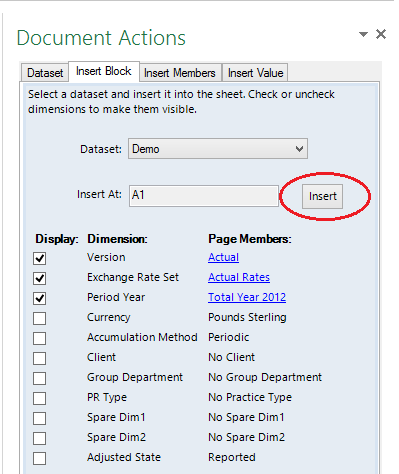
The basic report will now be shown in Excel which you now modify as needed

Created with the Personal Edition of HelpNDoc: Write EPub books for the iPad
CBR - Modifying the layout
Cell Based Reporting - Modifying the layout
Now that the data is shown of the page, click on one of cells with numbers being returned.
As you can see from the example below, what is being returned is based on a formula referencing certain fields on the page.
As with any formula in Excel, you can now change what and where some of these cells are referencing
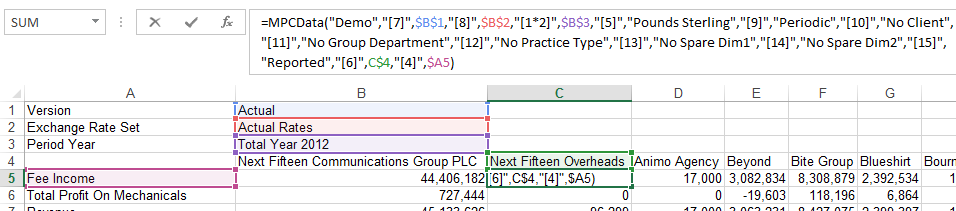
For example, I may want the Actual version numbers beside the budget numbers. I inserted some columns and rows, and in cell C6, entered the version I want in this column.
I copied the formula from B7 to C7 and then changed where the formula was getting the version from. In this case, from $B$1 to $C$6
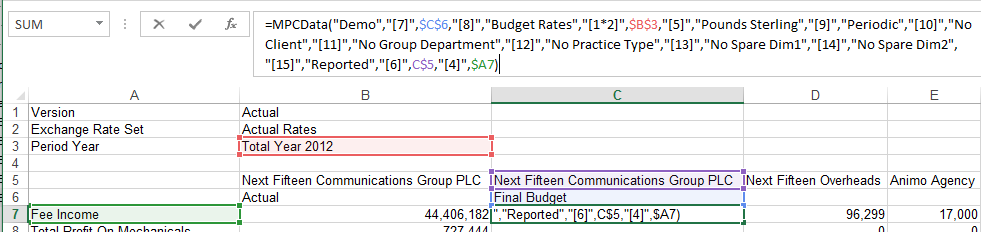
As I hope this illustrates, the formating and what is on the page, is quite flexible.
You can enter rows and columns as you need, and format each cell as you would any spreadsheet
Created with the Personal Edition of HelpNDoc: Easily create HTML Help documents
Cell Based Reporting - Dynamic changes
In the majority of cases, your dataset will be setup in such a way which will allow you to change an item on the page to return different data, for example, report data for a different month, version, currency etc.
Below is a quick example on how you could make your spreadsheet more dynamic for the user
Open a new tab in your spreadsheet and click on the "Insert Members" tab in the Document Actions.
Select the dimension you want to be dynamic, for example the Period. Select the direction Down, and click the Insert button.
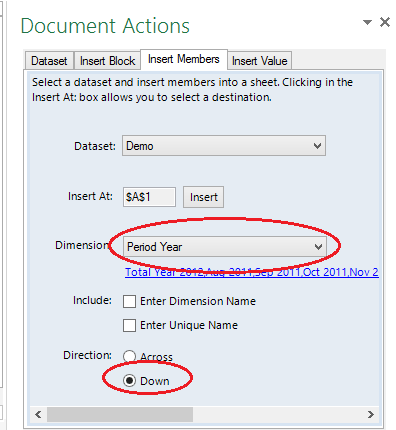
This will insert all the entries you have chosen in your dataset into the spreadsheet
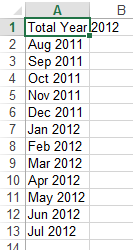
Go back to your report sheet and click on the cell you want to make dynamic.
Select the Data tab and choose Data Validation
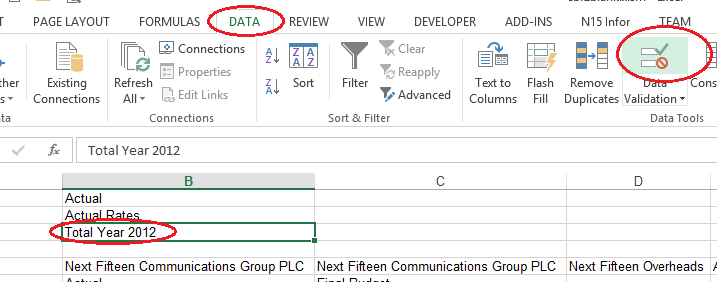
Select List and choose the Source being the location of the items you just inserted above. Press OK
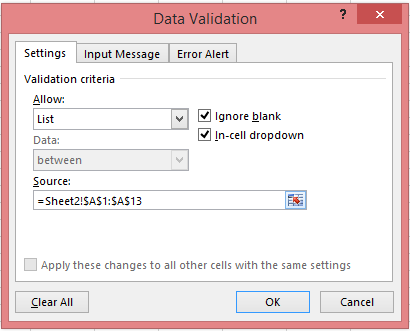
You should down have a dropdown list, which if you change, will automatically update the data in your report based on your selection
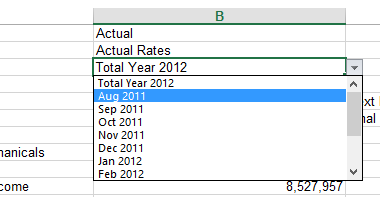
Created with the Personal Edition of HelpNDoc: Create help files for the Qt Help Framework
Setup Menu
This goes over the items available within the Setup menu in Infor
Created with the Personal Edition of HelpNDoc: Free iPhone documentation generator
View Manager
View Manager help can be found here...
Created with the Personal Edition of HelpNDoc: Full-featured EPub generator
Monitor Views
Views are cached on the server in order to speed up processing.
When you make changes to a view through View Manager, you may not see these changes due the view being cached.
In these cases, you can release the cache with this page.
Select the view(s) you want to refresh from the list and click the "Unload" button.
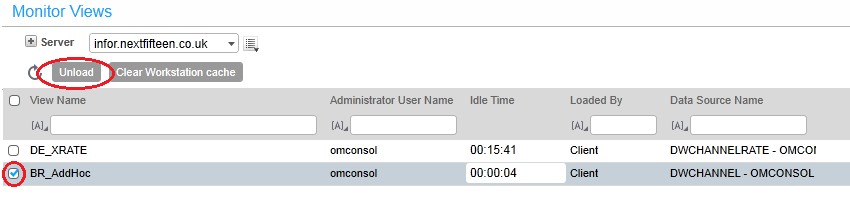
Clear Workstation cache - Infor caches certain information onto a users workstation. Sometimes this needs to be cleared which you can do by clicking on the "Clear Workstation cache" button. Normally you will be prompted by the helpdesk to do this although there is no harm running this yourself at any time
Created with the Personal Edition of HelpNDoc: Produce online help for Qt applications
N15 Admin
This goes through the options available under the N15 Admin menu
Created with the Personal Edition of HelpNDoc: Easily create HTML Help documents
Exchange Rates
This page allows you to view the exchange rates used in the system.
To change, change the rate to one of these rates, update the rates, and click on the icon in the top right of the page, to save it back to the server.
Created with the Personal Edition of HelpNDoc: Easily create CHM Help documents
Client Security
This page allows to you set which clients are assigned to your unit.
If you cannot find your client in the list, please email the helpdesk with the name of the new client you are wanting to add. The helpdesk will respond once it is created.
- Select the Unit you want to add clients to
- Select the Clients from the left Available Clients list
- Click the ">" button to move them to the Selected list
- Repeat as needed
Created with the Personal Edition of HelpNDoc: Easy EBook and documentation generator
Default all Clients

Default All Clients option allows us to assign a client to all units.
This is used primarily for inter-company clients in the inter-company income and inter-company balance sheet tabs.
The process for adding a client is the same as for normal clients, just make sure you tick this box before making any changes.
Created with the Personal Edition of HelpNDoc: Full-featured Documentation generator
Inactivate Existing Clients
This page allows to set some of your clients as Inactive.
This will stop the client from being downloaded into a blank template (it will not remove the client from a spreadsheet if it has already been previously downloaded)
You should only inactivate a client if it has had no income within the last 12 months.
- To inactivate, select the Unit from the dropdown list
- Click the "Inactivate Existing Clients" button
- From the left, active client list, select the clients you want to inactivate and click the ">" button
- If you want to activate a previously inactive client, select the client from the right box, and click the "<" button
- Repeat as needed
Created with the Personal Edition of HelpNDoc: Free PDF documentation generator
Keywords
Keywords are used within Views or Pivot Reports to allow for dynamic changes across a set of reports without the need to have to change each view individually.
For example, you could have a keyword set for the Reporting Month, another for Rateset etc
When you create your views, you would set them up referencing these keywords.
- Open the Keywords page
- From the Connect list, select "DWChannel - OMCONSOL"
- From Activity list, select "Lock for Editing"
- In the Dimension drop down, select "Period Year"
- Select the Keyword in the list
- Remove the existing keyword by clicking the X button
- In the Members section, select the member you want to add
- Press the Save button
- From the Activity list, select "Clear Lock"
Created with the Personal Edition of HelpNDoc: Full-featured Help generator
Snapshot Version
Snapshot version allows you to copy a version to another version. For example, copying Working Budget to Final Budget, Current Reforecast to Q2 Reforecast etc.
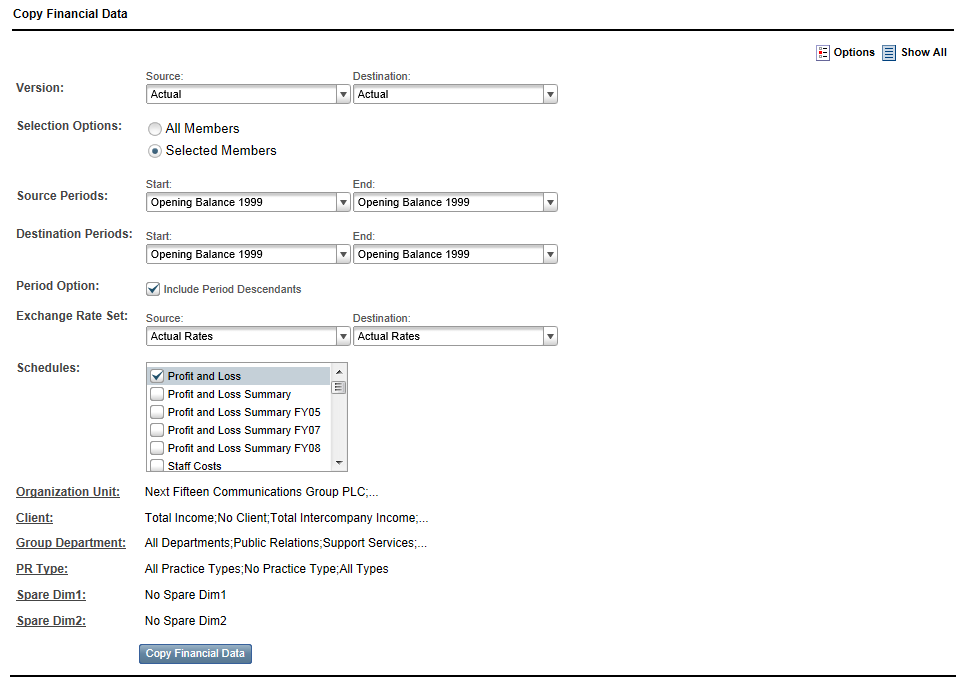
- Choose the source Version you want to copy and the Destination version you want to copy to
- Select the Source Start and End Periods
- Select the Destination Start and End Periods
- Leave the Period Option ticked
- Select ALL Schedules!!!
- Normally you would leave the rest of the options (Org Unit, Client etc) as they are, as this will include all options, however if you only want to snapshot certain untis, you can restrict what will be copied over by clicking on each title.
- Click the options button in to the top right section of the page. If you are copying a budget or reforecast version, tick the "Detail Budgeting Data" option and press OK
- Click the "Copy Financial Data" button
This will now tun the snapshot. This could take a little while
Created with the Personal Edition of HelpNDoc: Easily create Web Help sites
Start New Year
Start New Year brings the closing profit in the year over to the profit b/f in the balance sheet.
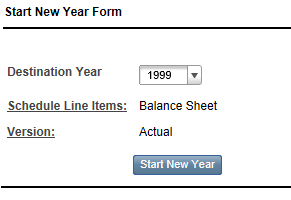
- Select the new year
- The Schedule Line Item should show "Balance Sheet". If it doesn't, please change it so that it does
- The Version should be set to Actual. Change it so that it does
- Click the Start New Year button
Created with the Personal Edition of HelpNDoc: Free CHM Help documentation generator
Administration
Administration
This menu is only available to the N15 Systems team. It goes through the main pages that are typically used regularly.
Please refer the Infor PM Administration Guide PDF provided by Infor in respect to the rest of the menu's options. This will be available from Infor Xtreme website, latest version's image (iso) and normally a copy is kept within the software directory.
Created with the Personal Edition of HelpNDoc: Produce Kindle eBooks easily
Architect
Created with the Personal Edition of HelpNDoc: Easily create Qt Help files
Focus Range
The Focus Range page is used to define which portions of data are open for data submissions. When a focus range is set for any given version, the data can only be modified within the focus range, and anything outside of that range can only be viewed, not modified. If no focus range is set for a version, the default is that the entire version is open.
Focus range protection applies only to database access through Infor. It doesn't prevent updates via other third party products.
To amend a focus range :
- Open the focus range page
- From the Connect list, select "DWChannel - OMCONSOL"
- From Activity list, select "Lock for Editing"
- Against the Version line, select the Opening period and year and the Closing period and year. This will form the range in which changes can be made
- Click the Apply Changes Button
- Repeat for any other Version
- From the Activity list, select "Clear Lock"
Created with the Personal Edition of HelpNDoc: Free CHM Help documentation generator
General
Created with the Personal Edition of HelpNDoc: Easily create EBooks
Navigation Administration
The Navigation Administration allows you to set up the folders and pages used within the application and also who has access to these.
There are four functional areas:
- Design Navigation
- Navigation Groups
- System Parameters
- Import Navigation
We will go the first two here. The other functional areas are not used and you can reference in the Infor documentation if you are interested.
Created with the Personal Edition of HelpNDoc: Produce electronic books easily
Design Navigation
The design navigation allows you to set up the folders and pages used within the application.
You can then assign which Navigation Group can see which folder and/or page.
The right click menu allows you to add, delete and copy folders and pages
Adding a Folder
- Open the Navigation Administration page
- Click the Design Navigation tab
- Right-click the folder immediately above where you want to add the folder and seelct Add Folder
- Select As Child or As Sibling
- In the Default Name box, specify the name of the folder
- For Platform, select the audience of the folder. You are prompted to apply the option to all descendants of the folder
Copying a Folder
- Right-click on the folder you want to copy and select Copy
- Right-click the folder or page you want to copy the folder and select Paste. If you select a folder, you can add the new folder as a childer or as a sibling. If you select a page. the new folder is placed immediately after the page
- In the Default Name box, secify a name for the folder
- Click Create
Removing a folder
- Right-cliclk on the folder you want to delete and select Delete
- Click Yes when prompted to confirm
Adding a page
- Right-click a folder or an existing page and select Add Page. You can add the page as a child or a sibling
- In the Default Name box, specify the name of hte page
- In the URL box, specifiy the URL of the page
- (optional) For the Image URL, browse to the image to use for the thumbnail view
- (optional) For the Large Image URL, browse to the image used in the preview window
- For Patform, select the audience for the page
- Under Permissions, sleect the groups that should have access to the page. Select the Inherited check box if you want the page to inherit permissions from its parent so you do not have to set the individual persmiision on the page
- click Create
Copying and Removing a page
The steps are same as a folder
Using Custom images
Images are used in the thumbnail view and the preview window. CPM includes a standard set of images
however you can use your own custom images.
The following formats are supported:
- JPEG image
- CompuServe GIF
- PNG Portable Network Graphic
To appear in the navigation panel, the files must be stored on the CPM Server computer. Copy the file to the appropriate image directory under the Program Files\Infor\CPM\Navigation\CSS directory. The image directories are named LargeNavigationImages and SmallNavigationImages.
Created with the Personal Edition of HelpNDoc: Easily create iPhone documentation
Navigation Groups
You can secure the application down to the page level through Navigation groups.
Adding users to an existing navigation group
- Open the Navigation Administration page.
- Click the Navigation Groups tab.
- Select the navigation group to which you want to add users.
- In the Add Group Members box, specify the names to include in the navigation group. The names must be separated by commas or semi colons. The name will be the full network name e.g. "NEXTFIFTEEN\MacintyreR"
- Click Check Group Members.
- Click Save.
Created with the Personal Edition of HelpNDoc: Generate Kindle eBooks with ease
Creating a new user
Creating a new user requires 4 steps:
- Create the Windows account
- Create the SQL Server login
- Assign the access rights and roles
- Assign the navigation rights
Create the Windows Account
- A separate windows account is required to be created especially for Infor
- Create the account in the NextFifteen\Users\Comshare forest in the AD
- Userid's should be in format LastName + First Initial e.g. MacintyreR
- Passwords follow the standard Windows requirements
Create SQL Server Login
- The windows and SQL server logins must be the same
- Use the following script to create the SQL login
sp_addlogin '<login_name>', '<password>'
go
use OMCONSOL
go
sp_adduser '<login_name>', '<user_name>'
go
where:
<login_name> is the sign in name for the user (will be the same as the windows username).
<password> is the password (same as the windows password created above).
Assign Access rights and roles
Check Out the User Security Structure
- Select Activity > Check Out.
- Click Check Out User Security.
- Select the Load Immediately check box. This makes sure that the structure in your local cache is up to date.
- Click Check Out. A message box appears when the check out is complete and again when the structure has been loaded.
- Click Close.
- Select Activity > Assign User Security
- Select the Login from the left hand list box
- Choose the Role for the User (See the list of Roles here)
- Click on the Security Profile Tab
- Click the New Security Profile button
- You have the choice of either creating a blank profile or copy an existing one. The later is useful when giving the same access as someone else
- Once created, click on the Properties tab, and change the name and description to be the same as the user's login
- Click on the Definition Tab
- Within the Members field, select the unit or parent of the unit you need to give access to
- Select the relevant Access i.e. Read and Write, Read Only etc
- Select whether all descedents are to be included
- You also have under Detail Budgeting Access to restrict access to Salary or Asset information by clicking on the "..." button
- Once completed, save and Check In
Check In the User Security Structure
- Select Activity > Check In
- Click Yes when prompted
- Provided the audit is passed, the changes will have been checked in. If the audit finds any issues, the changes will not have been checked in. You can check the audit results window to see why, fix the issues and they try checking in again
Release Changes
- Select Activity > Release
- Click Yes
Assign Navigation rights
- Within Infor PM, Select Administration > General > Navigation Administration
- Select the Navigation Groups Tab
- Select the Group you want to add the new user to
- In the Add Group Members field, enter their full domain and username e.g. NEXTFIFTEEN\MacintyreR
- Select Check Group Members
- Click the Save button
Created with the Personal Edition of HelpNDoc: Create HTML Help, DOC, PDF and print manuals from 1 single source
User Roles
This a brief list and description of the user roles available within Infor:
In reality, we would only really use Controller and budget holder
Administrator
Has full access to all functions within the system. This role would be limited to the Group accountant
Controller
Senior role and can use most functions in Infor apart from admin functions
Budget Holder
These users are budgeting users and are normally responsible for entering the raw data and run consolidations
Accountants
These users are normally looking at consolidated data and are able to enter journals
Budget Holder - Accountant
These have combined functions of Budget Holder and Accountant
Budget Holder - Detail Budgeting Read Only
Have the same access as Budget Holders but have read only access to detail budgeting
Budget Holder - No Detail Budgeting
Have the same access as Budget Holders but have no access to detail budgeting
Analyst
These users only review data
Created with the Personal Edition of HelpNDoc: Produce online help for Qt applications
Copyright © 2013 by Next 15. All Rights Reserved.